
How to Add Custom Domain in Office 365

Table of Contents
Set up Custom Domain in Office 365 is crucial for every business who like to have a professional email address using a custom domain name to boost their business credibility and showcasing as more legitimate as branded.
This article will guide you with step-by-step process of How to Add Custom Domain in Office 365.
What is Microsoft Office 365?
Formerly known as Office 365, Microsoft 365 is a cloud-powered productivity platform which includes the Microsoft Business Email Services as well. Subscribing to their email service doesn’t only includes the email account but also bundled out with other exciting office 365 products such as outlook, word, excel, PowerPoint, OneDrive, etc.
The main purpose of the Microsoft Email Service is to help business users create custom email address like [email protected] which allow the owner to send the email using company name instead of any third party email service at the end which might look suspicious when receiving large or repeated mails.
It also provides extensive support with high mailbox storage, modern administrative control functions and enhanced security measures. With the custom domain email address in Microsoft Office 365, you will get access to complete office suite with more powerful tools to add to your business development.
Prerequisites:
2. Sign up Microsoft 365 Business premium subscription.
3. Delete the previous mail record in the Domain DNS management or zone editor – TXT and MX records.
Methods to Connect Custom Domain in Office 365:
1. Through Domain
2. Through Hosting cPanel
1. Connect Custom Domain in Office 365 through Domain DNS:
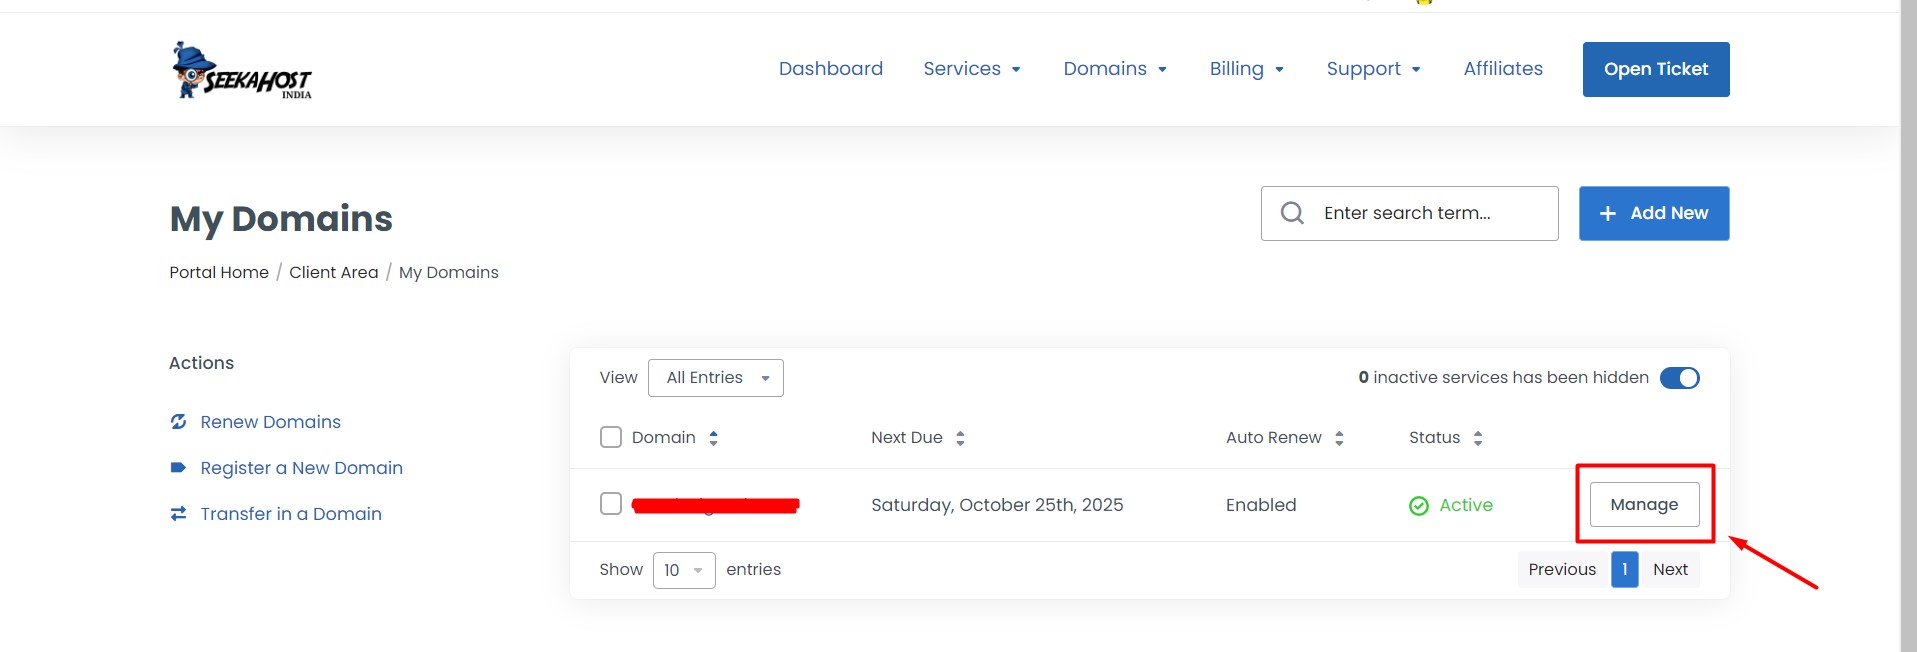
Step 1: Log in to your SeekaHost Client area.
Step 2: Select “Domains” section -> Click “Manage” near the domain name.
Step 3: Click “Nameservers” -> click “Use Custom Nameserver” and enter our domain default nameservers as below,
ns1.systemdns.com
ns2.systemdns.com
ns3.systemdns.com
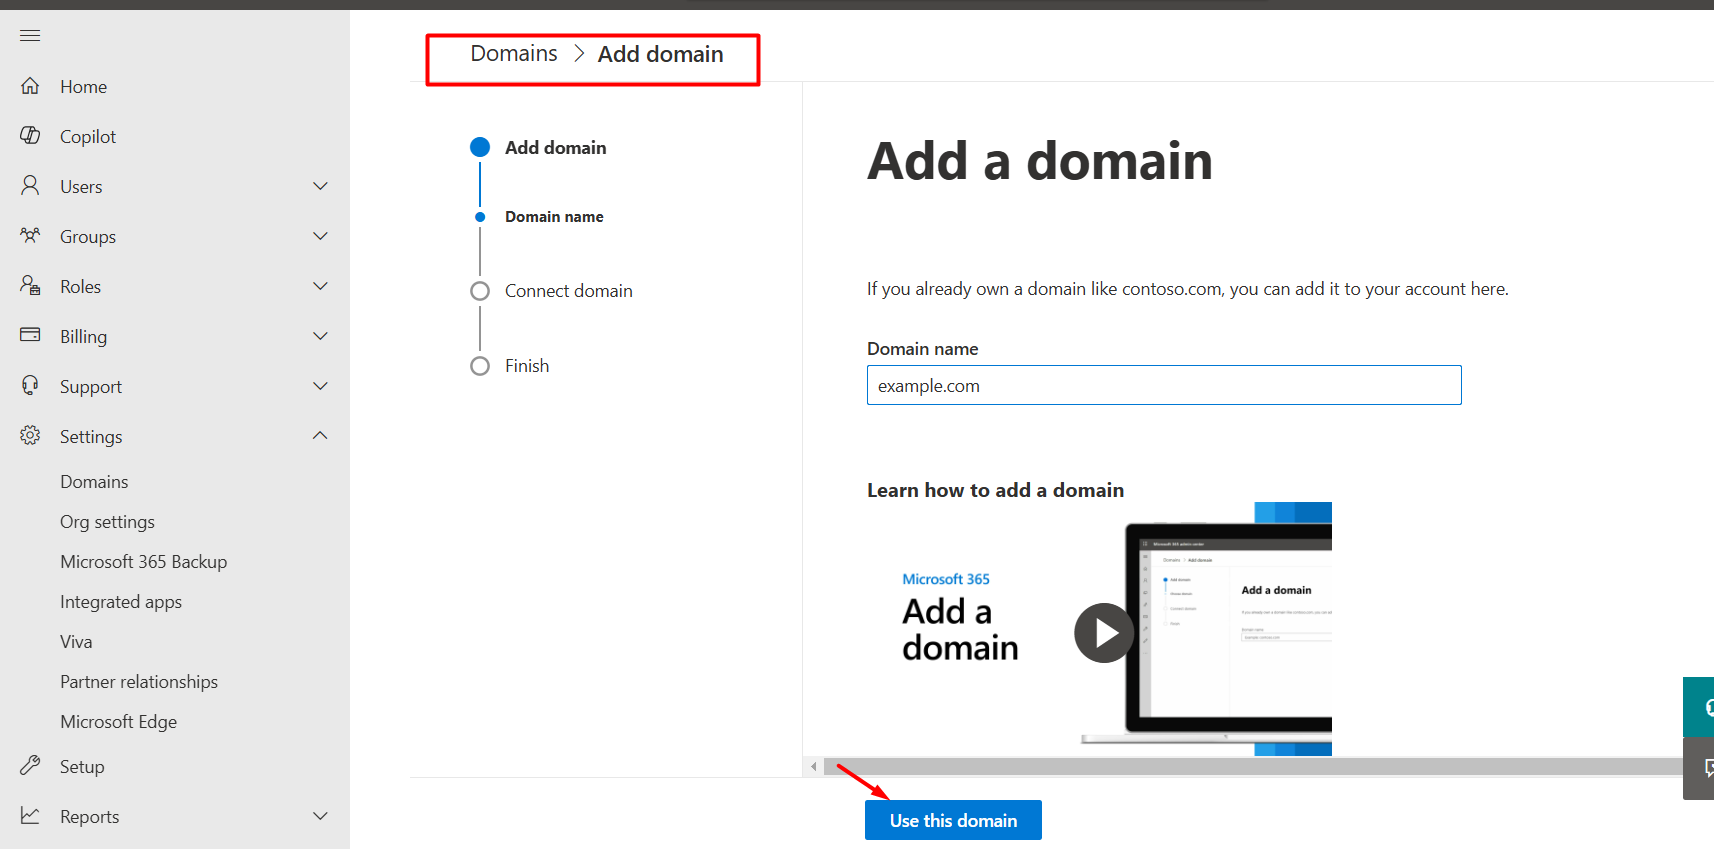
Step 4: To verify the domain ownership for the office 365 email, login to Microsoft Office 365 Account -> Settings -> Domains -> Add Domains.
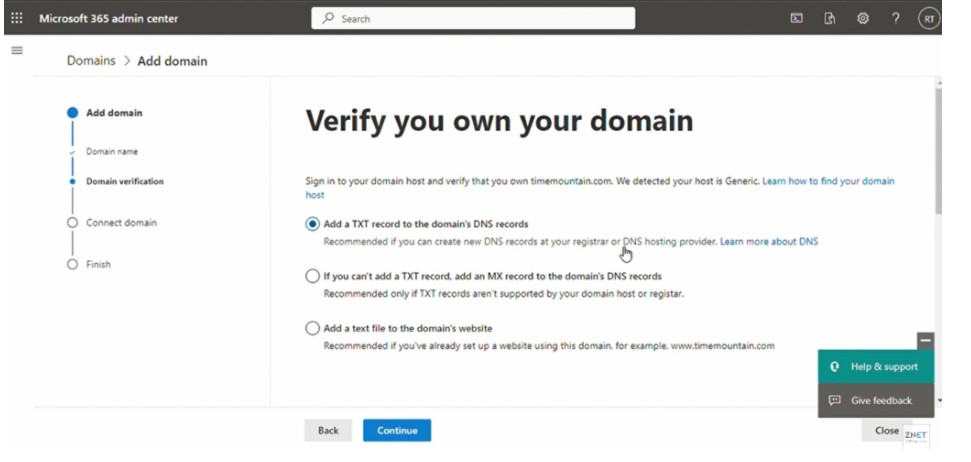
Step 5: You will be redirected to the Domain Verification screen. Choose the option “Add a TXT record’ to add your domain’s DNS records”.
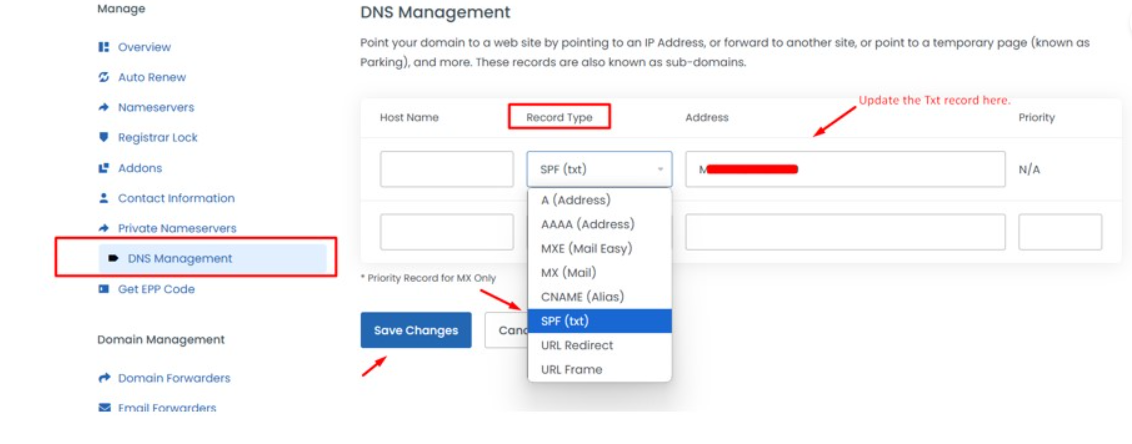
Now go to SeekaHost Domain management and click “DNS Management” option on the left side to add the Ownership verification txt record.
Update the remaining DNS records which will be listed once you add the domain and verify it. It needs to be updated in DNS management as follow,
| Host name | Record Type | Value | Priority Value |
| @ (or leave it blank) | MX | <domain-key>.mail.protection.outlook.com | 0 |
| autodiscover | CNAME(Alias) | autodiscover.outlook.com | |
| @ (or leave it blank) | SPF (txt) | v=spf1 include:spf.protection.outlook.com -all |
Note: Get the <domain-key> values from the Office 365 account to update in MX Record value.
Step 6: Update the values in address field by choosing the respective record type as follow,
Select record type as “MX Record” -> Update the value got from Office 365 in address field.
Select record type as “CNAME Record” -> Update the above-mentioned value in address field.
Select record type as “SPF (TXT) Record” -> Update the above-mentioned value in address field.
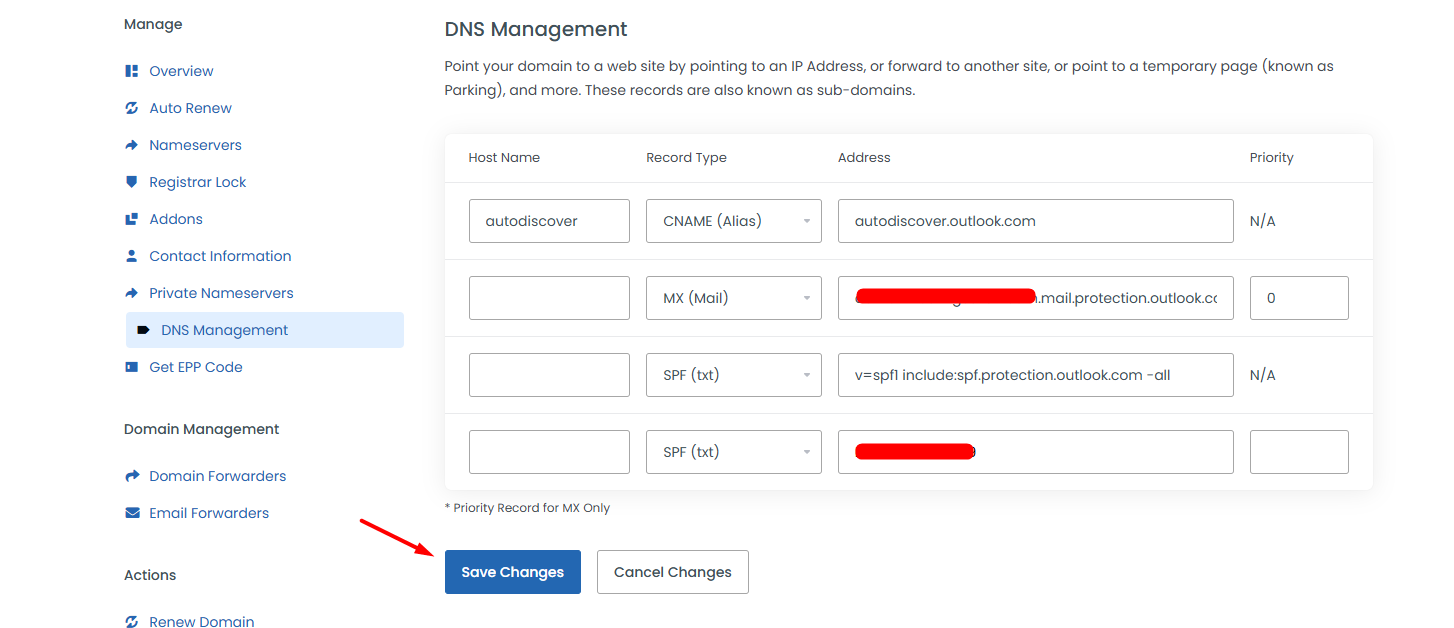
Click “Saves changes” after updating each record value in the DNS management.
Step 7: Now, go to the Microsoft Office 365 account, and verify the DNS records connection. Once done, you will see the below screenshot as ‘Domain setup is complete’.
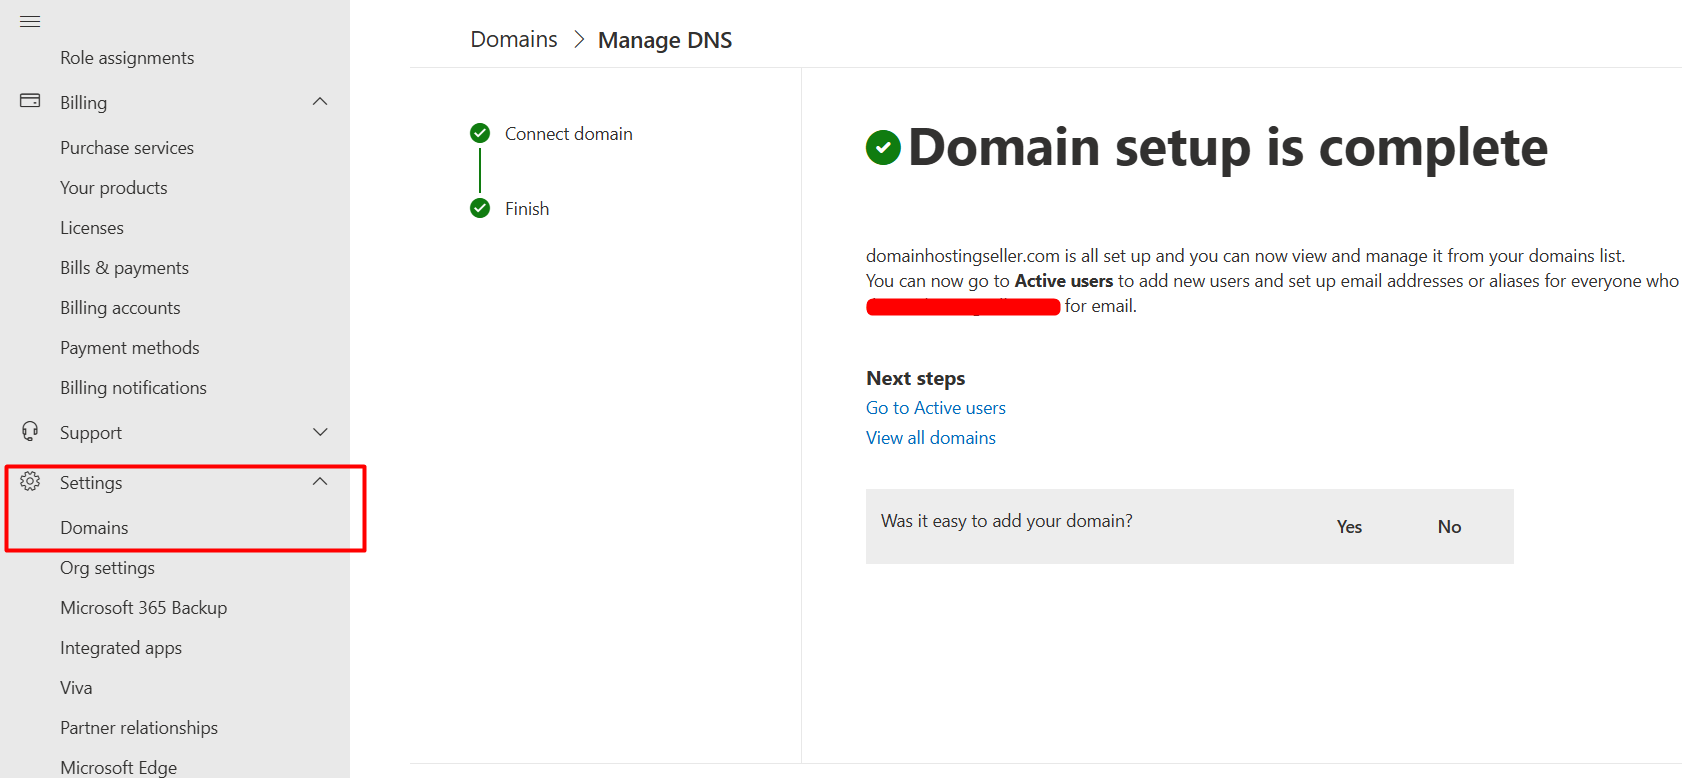
Now, that all your domain is connected with a Microsoft Office 365 account.
2. Connect Custom Domain in Office 365 through Hosting cPanel:
Follow this method, if you have updated the hosting nameserver in the domain, the DNS management option will go to the Hosting server and have to update the mail records in the cPanel zone editor.
Step 1: Login to the cPanel.
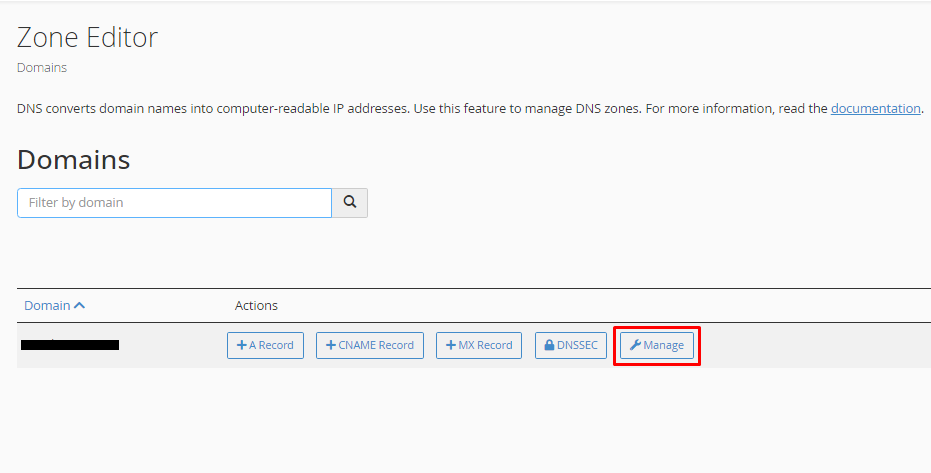
Step 2: On top, search zone editor and click the option.

Step 3: Here, click “Manage” button near the domain name.
Step 4: In Microsoft Account, choose the record type as TXT for domain Ownership Verification. Then in cPanel, click “down arrow” in right corner and click “Add TXT Record” to update your Zoho Txt Verification Code.

Update the record as follow,
- Name – Enter the domain name
- Record – Paste the verification code you have copied from the Microsoft.

Step 5: Click “Add MX Record” and update the MX records as follow,
- Name – Enter the domain name
- Priority: Enter the value as 0
- Record field: Paste the verification code you have copied from the Microsoft Account Mail.

Step 6: Click “Add CNAME Record” and update the CNAME records as follow,
- Name – Mail
- Priority: Enter the value as 0
- Record field: Paste the CNAME Value copied from the Microsoft Account.

Step 7: Click “Add TXT Record” and update the TXT records as follow,
Update the record as follow,
- Name – Enter the domain name
- Record – Paste the TXT value copied from the Microsoft Account mail.

Once all the DNS records are updated, click “Save All Records” at the top where you add the records.
Configure Email Routing in cPanel:
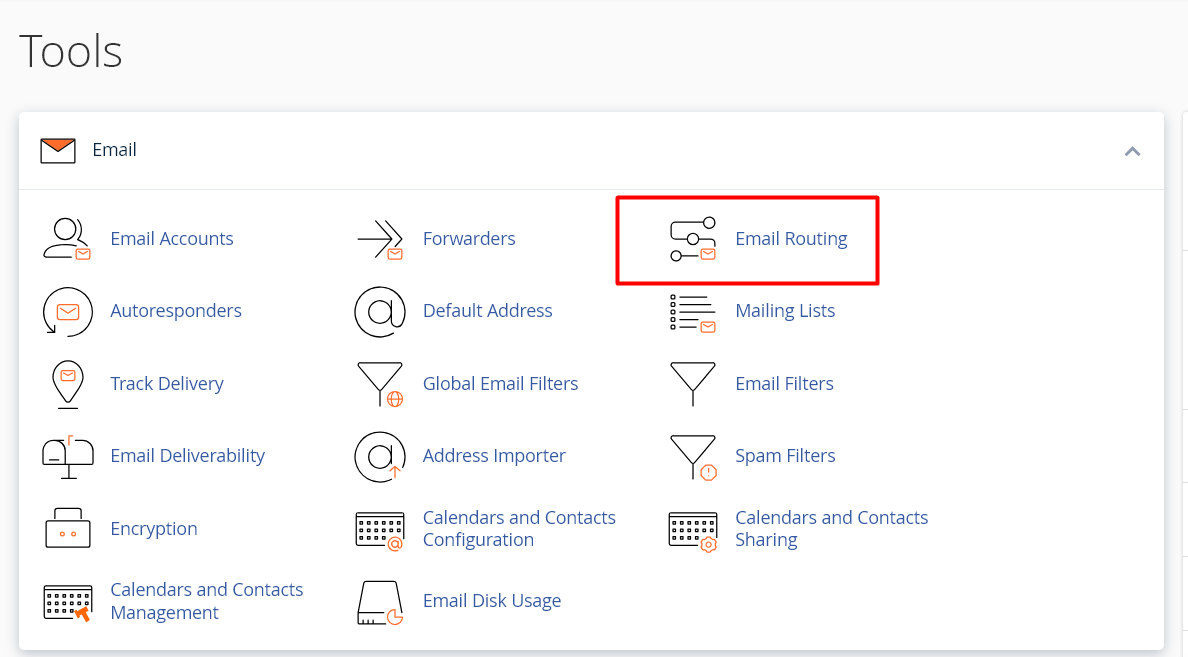
Step 1: Go back to cPanel home page and Under Email section, click “Email routing” in cPanel.
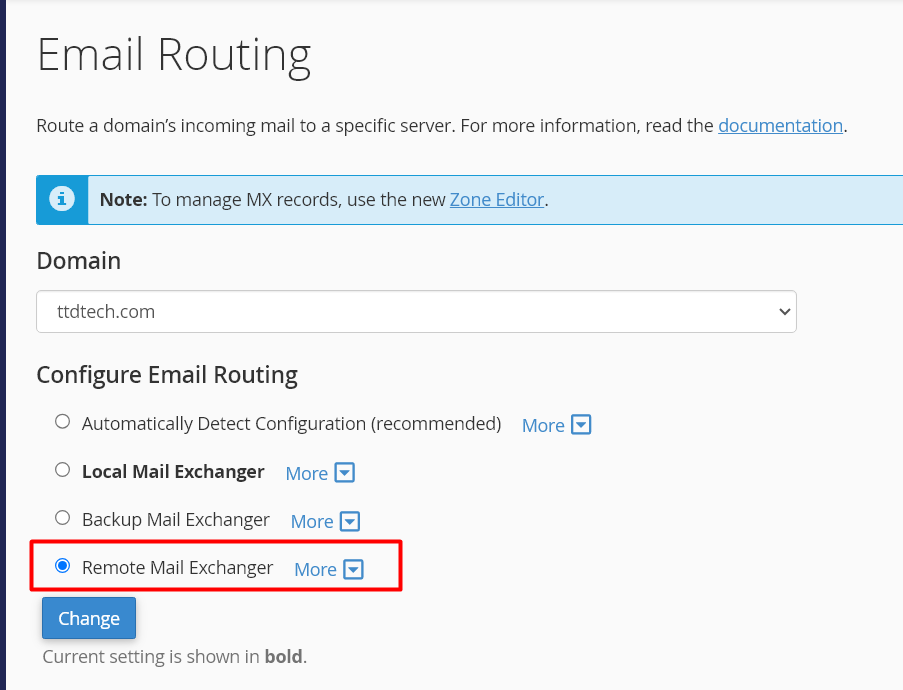
Step 2: Choose the respective domain name from the drop down and select the option as “Remote Mail Exchanger” and click “Save Changes“.
That’s all now your Office 365 records have been successfully added to the cPanel zone editor.
Note: Please wait for DNS propagation, which takes 24 to 48 hours to complete globally.
Hope this article helps you to setup Office 365 mail records in the domain and hosting.