How to create an Email Account in Virtualmin?

By Swetha

When it comes to communication, email is the best way of professional communication with clients.
Email is simple and easy to use. Once your account is set up, composing, sending, and receiving messages is simple.
An email account is the most important for a website. That email should be fast and convenient from which you can share files, documents, and anything over the internet.
Here we will see how to create an email account for your website in Virtualmin.
Step 1 :
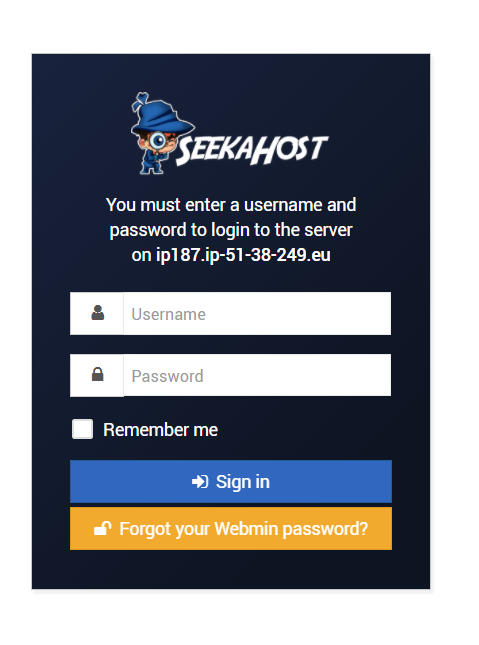
Log in to your Virtualmin account.
Step 2:
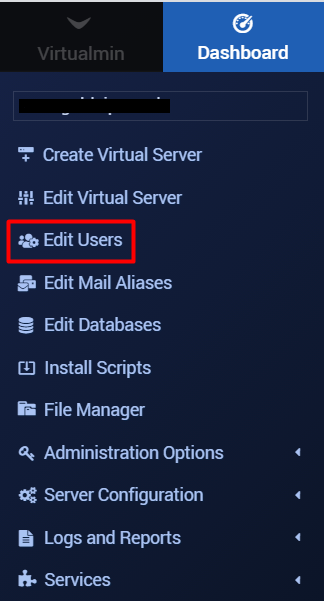
Once you logged in, go to the dashboard which is on the left-hand side. Select your domain name click “ Edit User”.
Step 3:
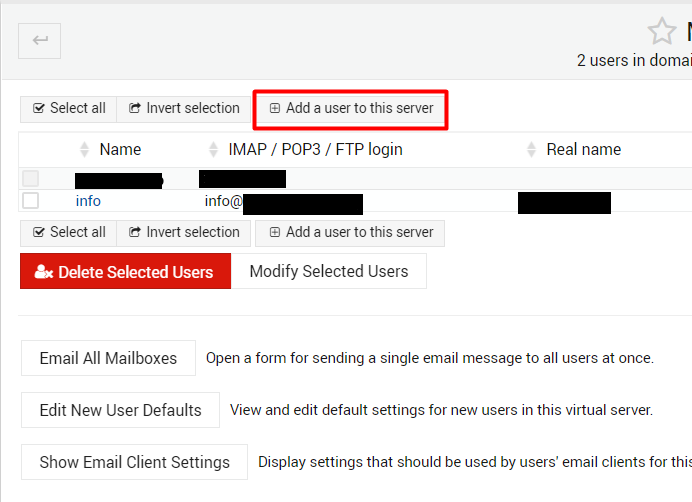
On the Edit Users page, click on “Add a User to this Server”.
Step 4:
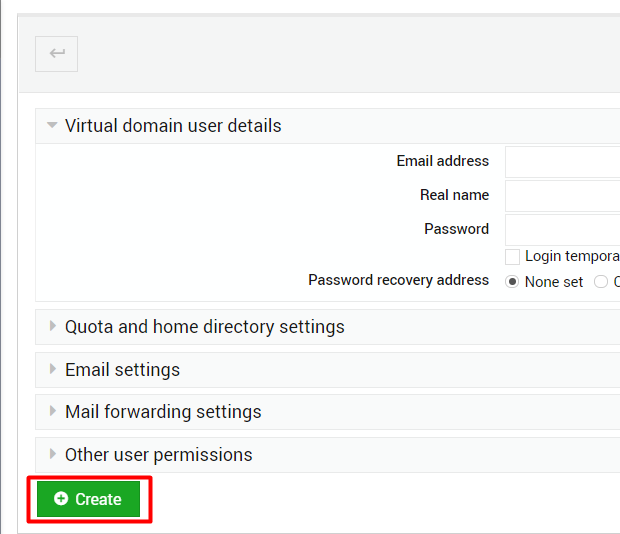
You will be navigated to the “Create User” page. Next, enter the Email Address, Real Email settings Name, password as per your requirement. Leave the Quota and home directory settings as it is and set other user permissions as default.
In case of if you want to forward your emails to another address, you can enter the email address where you want to forward the mails in the Email Forwarding Section.

Step 5 :
At last, click the “Create” button to create a new Email account.
Step 6:
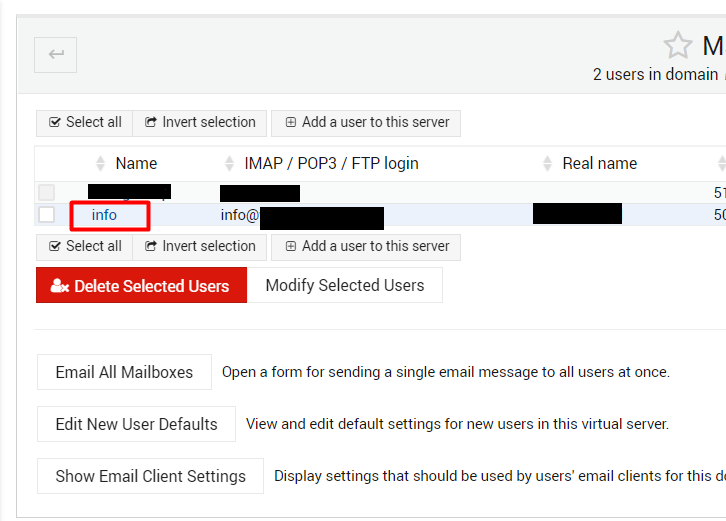
After creating the email account, then go back to the “Mail and FTP Users“. Click the email account name that you have created now. It will display the “Edit User” page.
Step 7 :
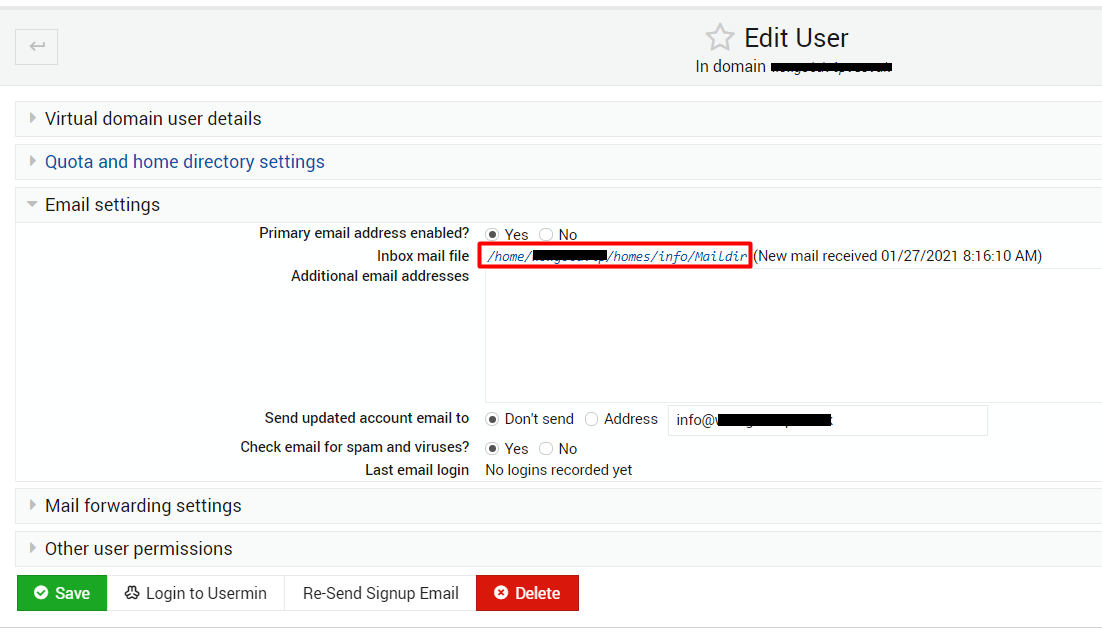
In the Email Setting section, you can see the path of your mail directory. Click that path to log in to your mail account.
Finally, your email account was ready!
If you are a registered user in SeekaHost and have any queries to be clarified or issues to be sorted, you can raise a ticket through the client area dashboard or email to [email protected]. For immediate interaction or guidelines, contact our support team available in LiveChat at the right bottom corner of the website.
