
How To Enable Two-Step Verification In WordPress
Enabling two-step verification in WordPress:
The two-step authentication or the two-factor authentication is an another method of adding security to your WordPress account. By, adding this to your account it increases your account’s security much better. Even if the account’s password is known to the stealer, this method prevents the stealer from making harm to your account.
In WordPress, they offer two-step verification via mobile device. At first, the mobile device is verified by sending a code. After that, once you verified your device when you log in the account anytime it sends a new code which must input before logging in. It is an extra step to the logging process of your account.
Setting up Two-Step Authentication in WordPress:
Before setting this method, you must use some of the authenticator plugins such as
- Google Autheticator
- WordPress 2-Step Verification
- Wordfence
- Unloq (2FA) etc.,
STEP 1:
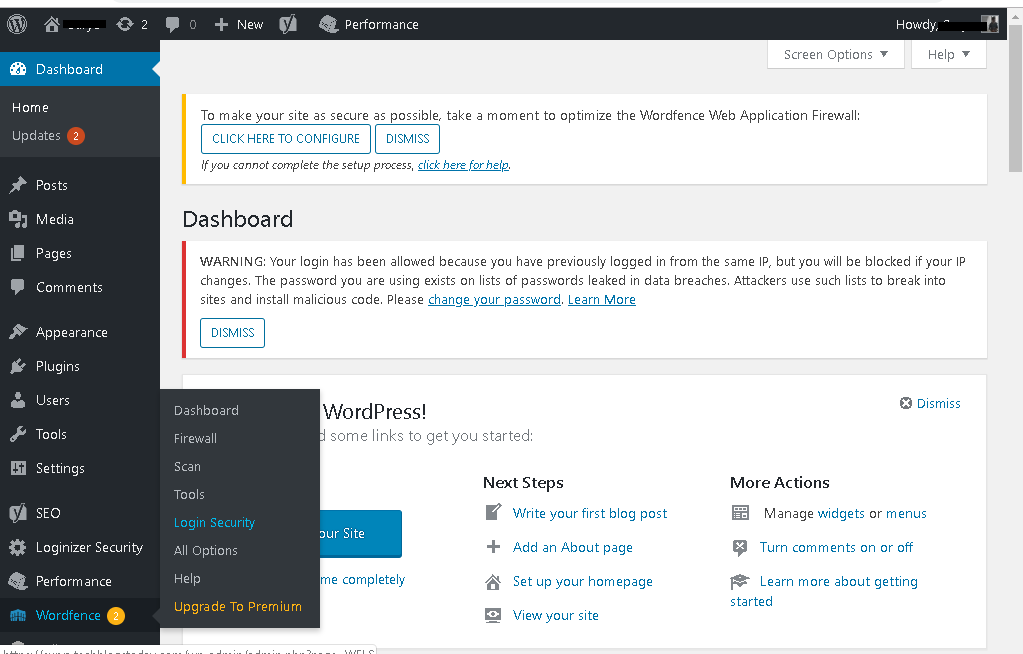
Download any of the above plugins. For example, I have installed Wordfence in my account. On the left hand navigation side, click on Wordfence.
STEP 2:
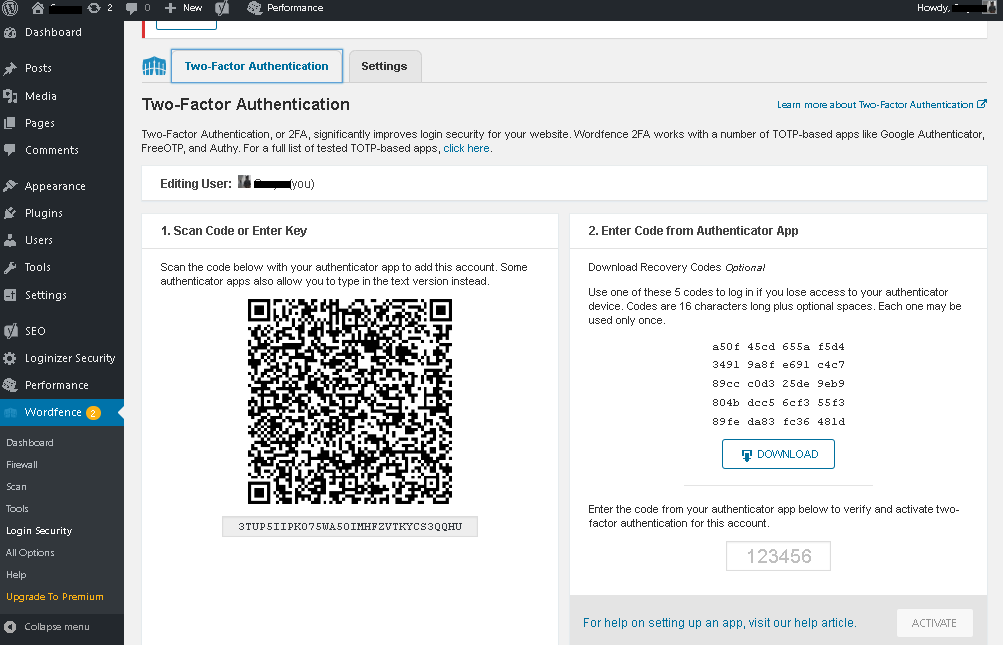
You will be able to see the ‘Login Security’ option and click on it. You will be taken to the settings of the authentication page.
STEP 3:
Next, you have two type of verification options. Either you can use the option ‘Scan the QR and enter the code’ (or) you can simply enter the authentication code available from your mobile authentication apps and click ‘Activate’ If you are using the mobile app, you should scan the QR code and enter the scanned QR code in the box and click ‘Activate’
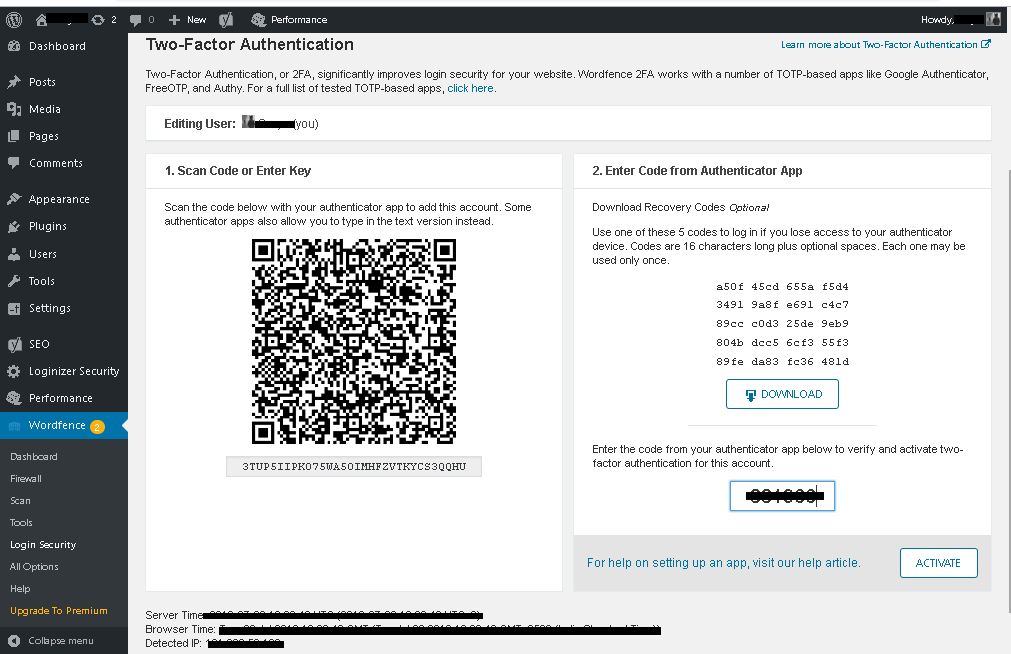
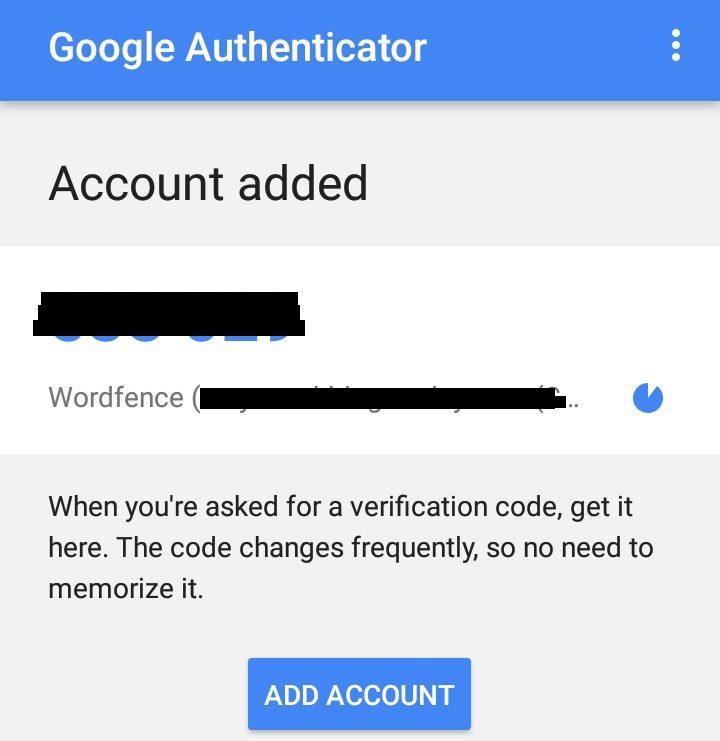
At down you can see an image of the Google Authenticator. The code is generated from the app in mobile and it is entered in the box to activate it.
STEP 4:
After you click on ‘Activate’, you will see a new page that the Wordfence 2F Authentication is activated on your account. You can also deactivate by simply clicking ‘Deactivate’.
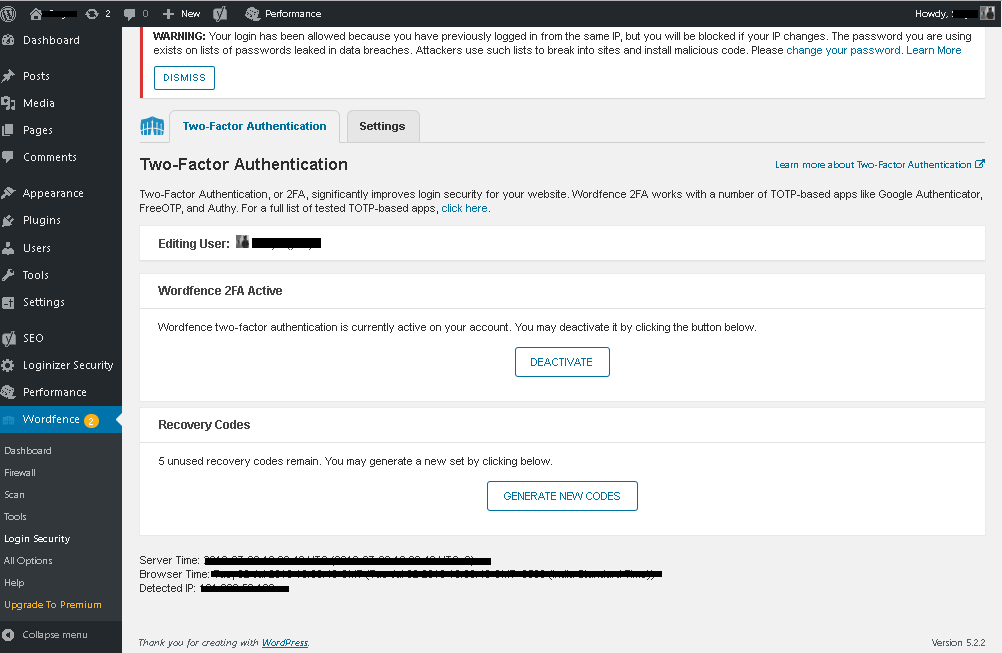
Finally, your account is protected by the two-step authentication.

