How to Set up Email Records in Cloudflare – SeekaHost Mail

By Aslam Saah
Table of Contents
For email deliverability, set up Email Records is necessary without this email will not function anyway. Along with this, there are other DNS records (SPF, DKIM, DMARC) which plays their part in defining the mails where to send, receive, secure and protect each mail digitally.
In this article, we will explain How to Set up Email Records Cloudflare for your domain pointed to Cloudflare.

Perquisites to Set up Email Records:
- Cloudflare Account.
- Active domain and Email Hosting Service.
- All Mail Records to update in Cloudflare.
If you don’t have a domain registered or mail hosting purchased, you can register the domain and purchase Email Hosting Service with us so you can save time and your process will be lesser.
What is Cloudflare?
Cloudflare is a worldwide Content Delivery Network (CDN) that speeds up the delivery of your website for visitors. It is one of the biggest network operating systems on the Internet. As like Cloudflare speed up the website process, setting up the mail service will also ensure faster deliverability.
Steps to Set up the Email Records in Cloudflare:
1. Automatic Configure:
If you are currently using a hosting service or domain DNS instead of Cloudflare with Email records already configured in them, add the domain and configure the Cloudflare nameserver in your domain to automatically fetch the records from existing DNS server.
2. Manual Configure:
Update the mail record directly in Cloudflare DNS Management one by one as follow hoping that you have already added your domain and updated the Cloudflare nameservers.
Step 1: Log in to your Cloudflare account.
Step 2: Navigate to DNS option from the left-side section and click ‘Add Record’ button.

Step 3: First, update the Mx records.
Choose the records type as Mx and then update the Mx records values in content field.

Step 4: Second, Update the CNAME record.
Click Add Record and Select the type as CNAME. Now update the CNAME record values in content field.

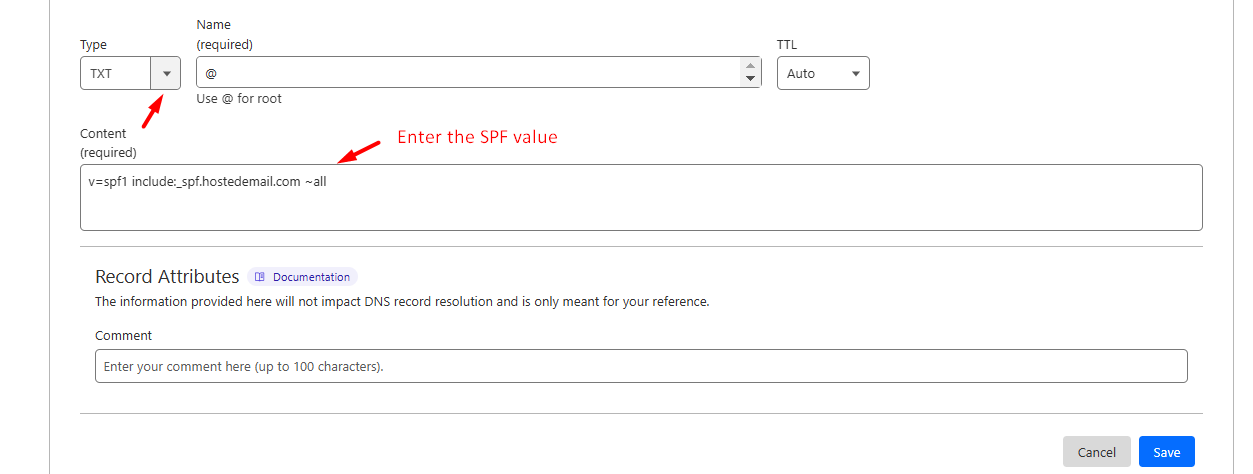
Step 5: Third, update the Txt record.
Add another record and select the type as TXT. Now update the TXT record values in content field.

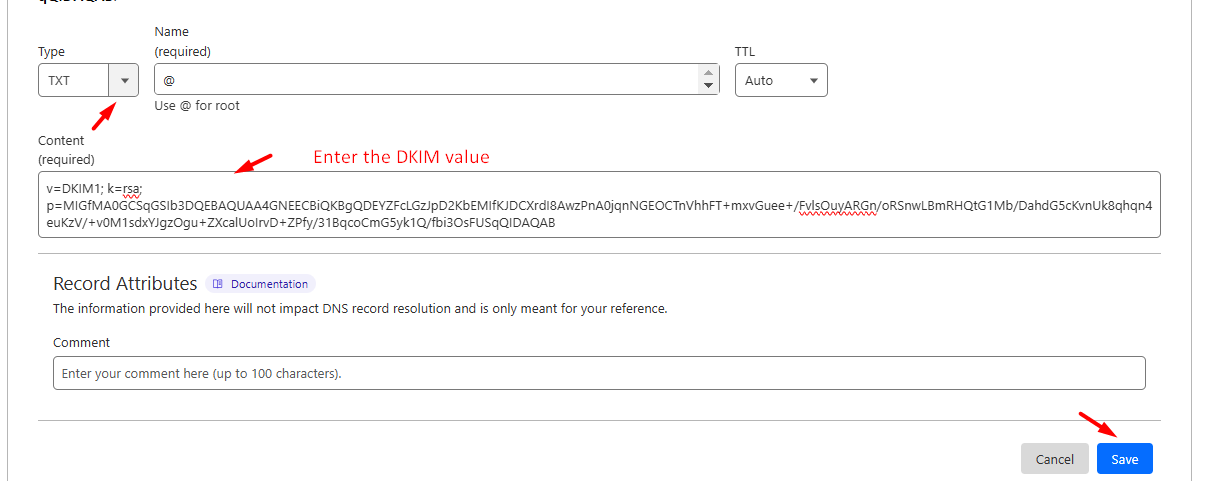
Step 6: Lastly, update the DKIM record. To update DKIM record, please get support from our team to update both public and private keys.
Again, add another record and select the type as TXT. Now update the DKIM value here.

Reference Article:
1. How to Setup SeekaHost Mail Records in cPanel
2. How to Setup SeekaHost Mail Records for your Domain
3. How to Setup DKIM Records for SeekaHost Email in Domain
4. How to Set up Custom Email Domain
5. How to Buy a Business Email Address For Your Domain
Once all records are updated, click “Save” button to complete the process.
Note: Update the Cloudflare nameserver in domain and wait for propagation to get completed.
That’s all now the mail records are successfully updated in Cloudflare.
