How to Setup DKIM Records for SeekaHost Email in Domain
Table of Contents
While mx records, spf, txt records are important for email service to function properly without getting bounced back, it is important to setup DKIM record and not overlook since it is one of crucial factors in updating DNS records for the email hosting.
Let’s discuss the basic about DKIM record and How to Setup DKIM Records for SeekaHost Email in Domain.
What is DKIM?
DomainKeys Identified Mail (DKIM) is a reliable email authentication method that uses public key cryptography to verify mail. It allows the recipient to verify that an email that actually comes from the domain are authentic and hasn’t been tampered with during transit by adding a digital signature to your mail.
What is MX Records?
Like how the nameserver help the domain name find the hosting server of the website, the MX records helps find the mail server of the domain.
The MX Records include the Destination/value, priority value and hostname which defines the mail priority and destination. Some use multiple mail server in an MX record to keep the load balance and avoid outages and select a priority order. Mail first sent to lowest priority value first and then goes to next priority mail server if the first gets outage. Example as follow,
-
Mail server 1: Priority 10
-
Mail server 2: Priority 20
-
Mail server 3: Priority 30
NOTE: You can check the email deliverability or email records validity using the mx third party toolbox.
Records Required for Email Service:
1. MX Records – Directs a mail to a mail server by specifying which server is responsible for accepting messages on behalf of a domain.
2. CNAME – Canonical Name acts as an alias for a domain name, allowing it to point to another domain associated with the mail server. This record consists of a record name (e.g., ‘mail’) and a record value (the canonical domain). When configured with ‘Mail‘ as a subdomain, it directs requests to the canonical domain where the mail server’s IP address can be resolved.
3. TXT (SPF) – TXT or SPF record that contains SPF value in text data that mentions about the IP address or another domain name spf configuration, allowing you to authorize its mail servers to send emails on your behalf.
To obtain these records or to have professional business email, you should have a email hosting service for your domain to create business email username to create after domain i.e. @.
Instructions to Setup DKIM Record:
1. You should update the domain default nameserver.
2. Create Custom Domain Email after purchasing SeekaHost Email Hosting Service.
3. If you have updated custom nameserver for the domain, the you should manage the mail records in the cpanel only.
4. To configure SeekaHost Email Hosting with domain, update other records like mx record, cname, txt record.
5. There shouldn’t be any hold status on the domain that prevent the DNS records from propagating.
Steps to Setup DKIM Records:
Step 1: Generate DKIM private and public keys for use with DKIM selector by using the DKIM-generated tool
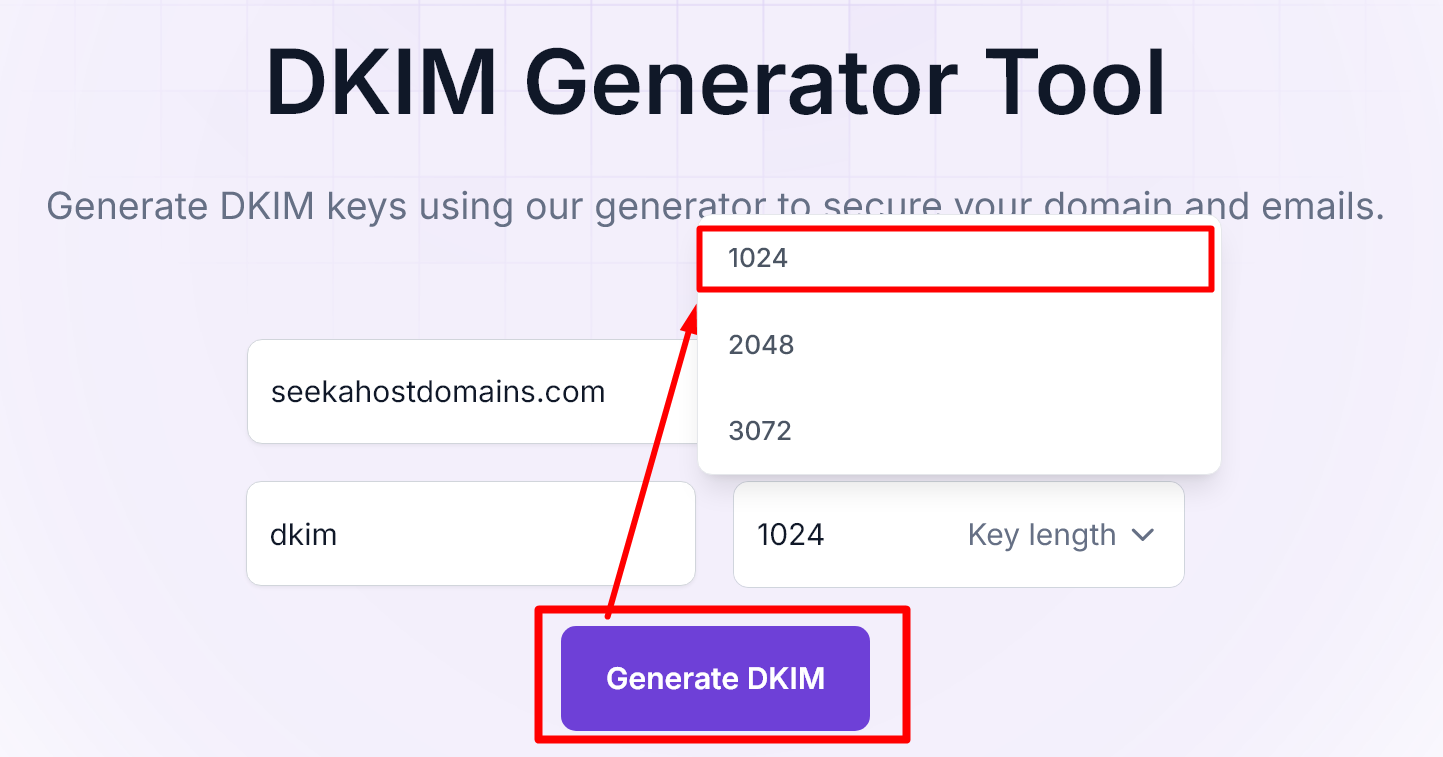
Enter the values as follow to generate both private and public with the DKIM generator,
Domain: Enter the domain name
Selector: Update the value as “dkim”.
Key Length: Choose “1024″ from the drop down.
Note: Set the key length to 1024 bit and generate the key to update in the domain dns management.
Step 2: Scroll down and click “Copy to clipboard” to copy the DKIM public value shown below and update it in domain DNS management.
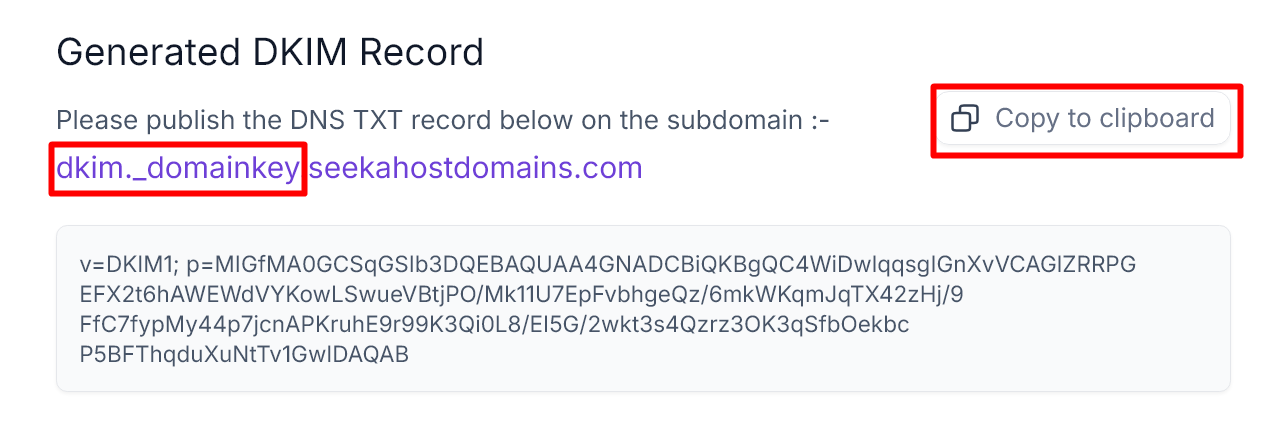
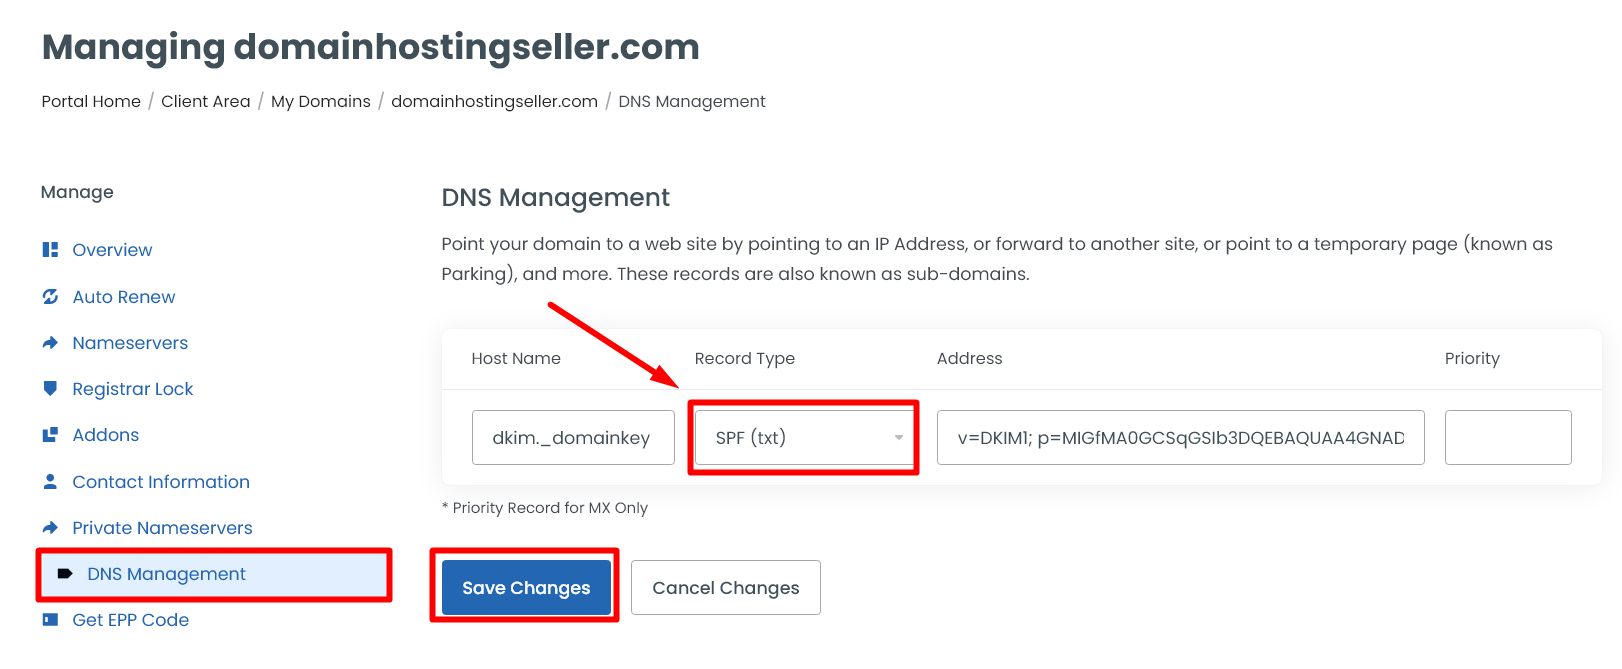
Step 3: Once the DKIM records are generated, you need to paste the copied public key DKIM value alone in domain DNS management. Go to the domain DNS management and choose the record type as “TXT“.
Hostname: Update the value as – dkim._domainkey
Record Type: Choose as TXT
Address: Update the txt value of public key
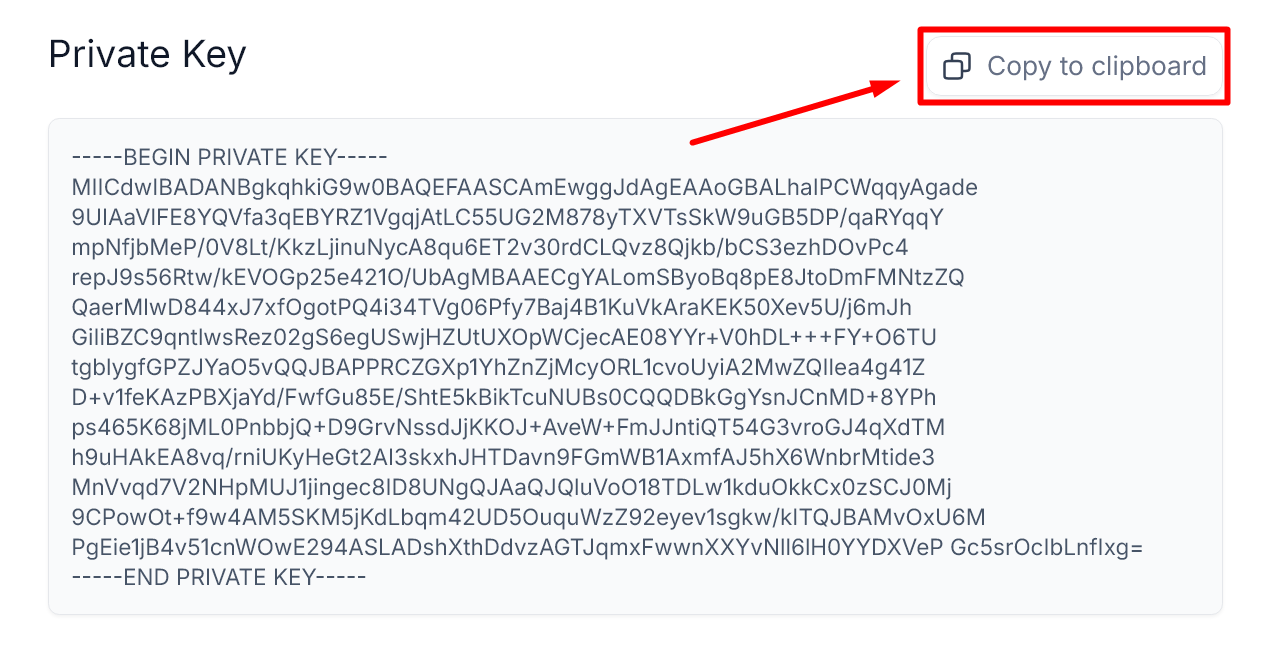
Step 4: Now again scroll up and click “Copy to clipboard” to copy the DKIM private key value as shown in the image below.
To update the DKIM value of private key in your domain DNS, please share the private key copied with us via ticket or live chat. Our support team will update the record in your domain through backend.
Reference Article:
1. How to Setup DKIM Records for SeekaHost Email in Domain
2. How to Set up Custom Email Domain
3. How to Buy a Business Email Address For Your Domain
4. How to Set up Email Records in Cloudflare SeekaHost Mail
5. How to Setup SeekaHost Mail Records in cPanel
Hope this information is helpful for you to update and setup the SeekaHost Email service with your domain.

