
How to Setup SeekaHost Mail Records for your Domain
Table of Contents
Email Service for the business is a crucial component for a business to take them closure to their clients and promotes professionalism with a custom domain. SeekaHost’s email hosting service stands out for its simple mail records configuration, Flexible mailbox sizes, Spam & virus protection, and White label.
Let’s find out how to complete SeekaHost Email configuration and easy setup for your domain.
Email Hosting:

Having a business email account ([email protected]) helps clients and customers finds the email as trusted and reducing the risk of them being flagged as spam. Dedicated email servers offer improved responses, security, reliability, and a more professional appearance for business communication. With few mail records, it will be easier and separate from website complete DNS settings.
How Dedicated Email Differ from Web Hosting?
Benefits:
1. Purpose:
Dedicated email hosting ensures efficient management and storage of business communication. In contrast, web hosting typically offers email as a supplementary service rather than as a primary component.
2. Storage and Management:
Your email service won’t rely on the website’s uptime, and storage space won’t be quickly exceeded since emails and website files are stored separately. This makes email management for your business easier and more efficient.
3. Security:
The dedicated email hosting service will be unaffected by any threat or affect on the website security since it offers specifically designed email security measures to protect email from threats and landing in spam to the receiving account.
Disadvantages:
1. Limited Reliability:
With shared resources, web hosting offering email service will have a higher level of downtime whenever the website hosted server or the website faces high traffic periods or server maintenance resulting in disrupted email communication and slower performance.
2. Complicated Migrations:
If you were to migrate to new web hosting, you would need to migrate both website and emails which can be cumbersome and time-consuming. Having dedicated email hosting, its easier to get support and migrate the emails alone to different providers.
3. Quality of Service:
The level of security for the web hosting email service is not at the same level as dedicated email hosting since hosting providers typically prioritize websites over the email service which could lead to poor deliverability of emails. Also, if the website were to be attacked with any security threat, it exposed to higher risks of spam, phishing attacks, and data breaches.
Prerequisites:
1. Purchase an Email Hosting Service with us.
2. Keep the mail records received to your registered mail address once purchase the email hosting with us.
- MX Record
- CNAME Record
- TXT Record
NOTE: To update DKIM record, contact our support team who will help you with the update for this record.
Process to Update SeekaHost Mail Records:
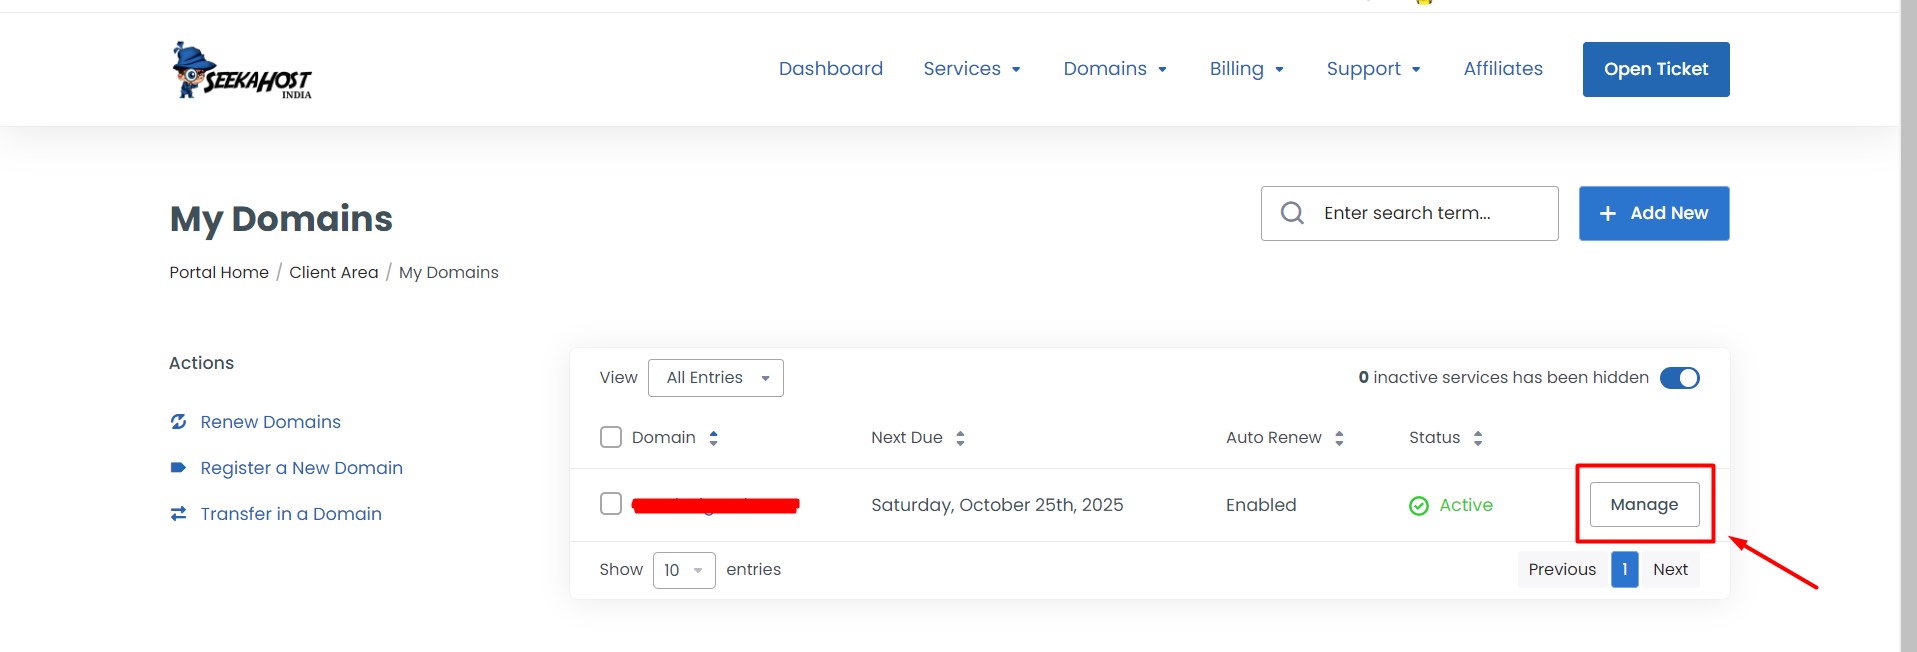
Step 1: Login to SeekaHost Client Area -> click “Domains” section -> Click “Manage” button near the domain name
Step 2: Click “Nameservers” on left side section and click “Use Custom Nameservers” and update our domain default nameservers given below:
ns1.systemdns.com
ns2.systemdns.com
ns3.systemdns.com
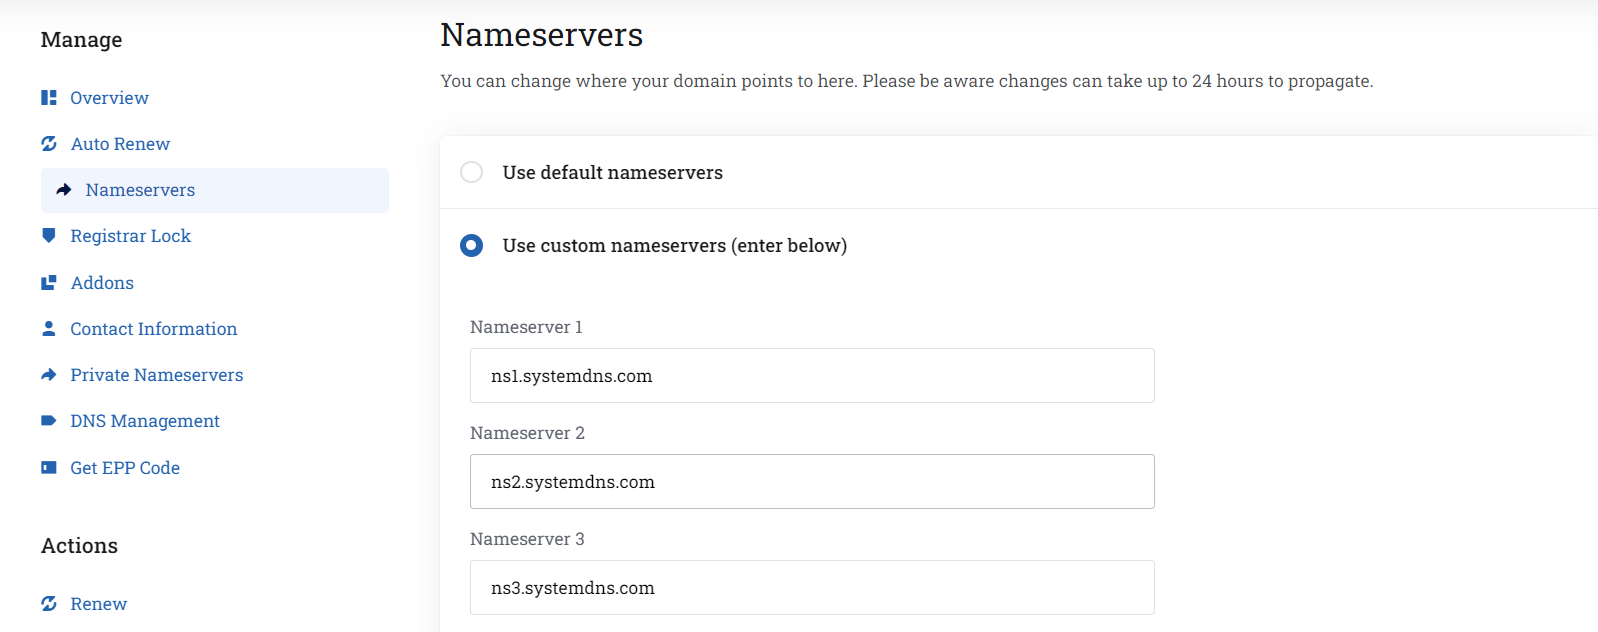
NOTE: If you have updated the hosting nameservers, then you have to update the mail records in the hosting DNS management only.
You can Find the mail records in the welcome mail with the subject as ‘Mail Hosting Order Details’.
Step 3: Click “DNS Management” option and choose the record type as “MX (mail)”.
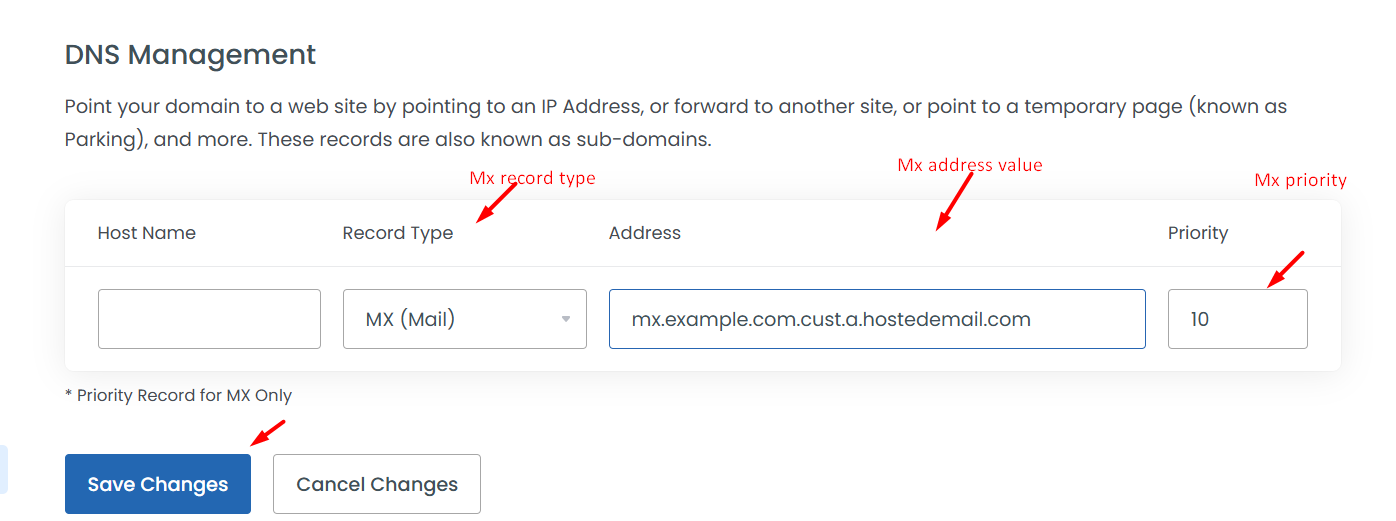
Hostname: Leave it blank.
Record Type: MX (mail)
Address: Mx record value for the email service.
Priority: Numerical value (e.g., 10, 20) indicating the order of priority.
Step 4: Now choose the record type as “CNAME” and update the cname values.
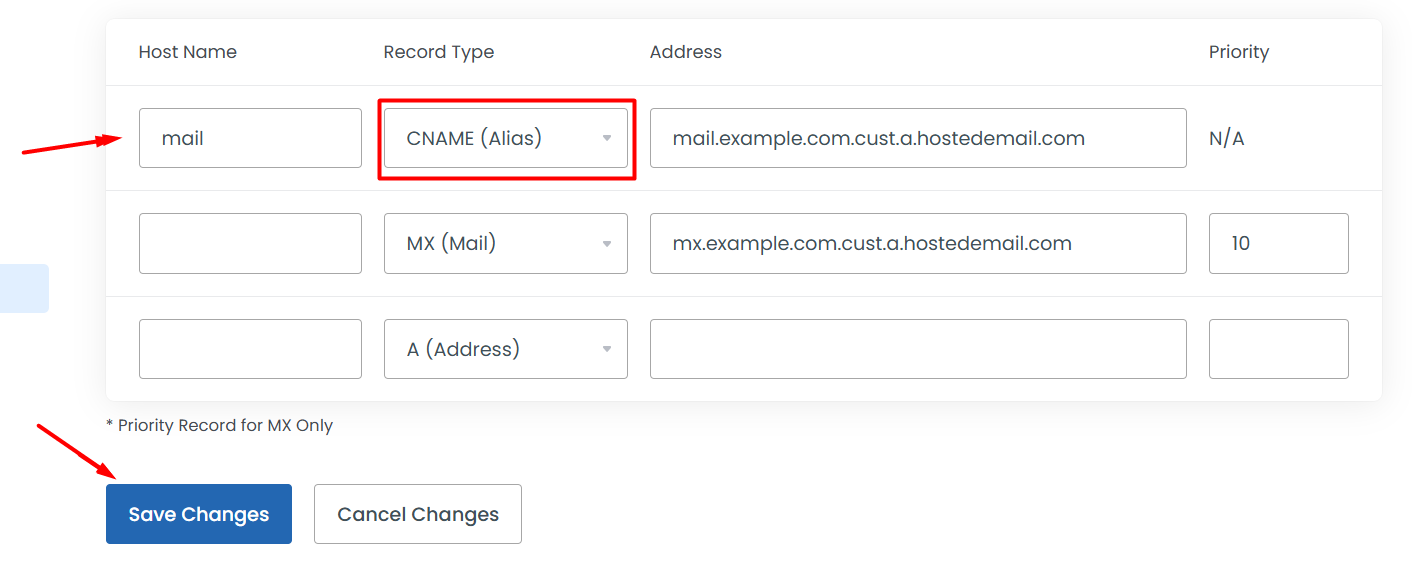
Hostname: Mail
Record Type: CNAME
Address: Enter the CNAME value for the email service.
Step 5: Now choose the record type as “SPF (txt)” and update the TXT values.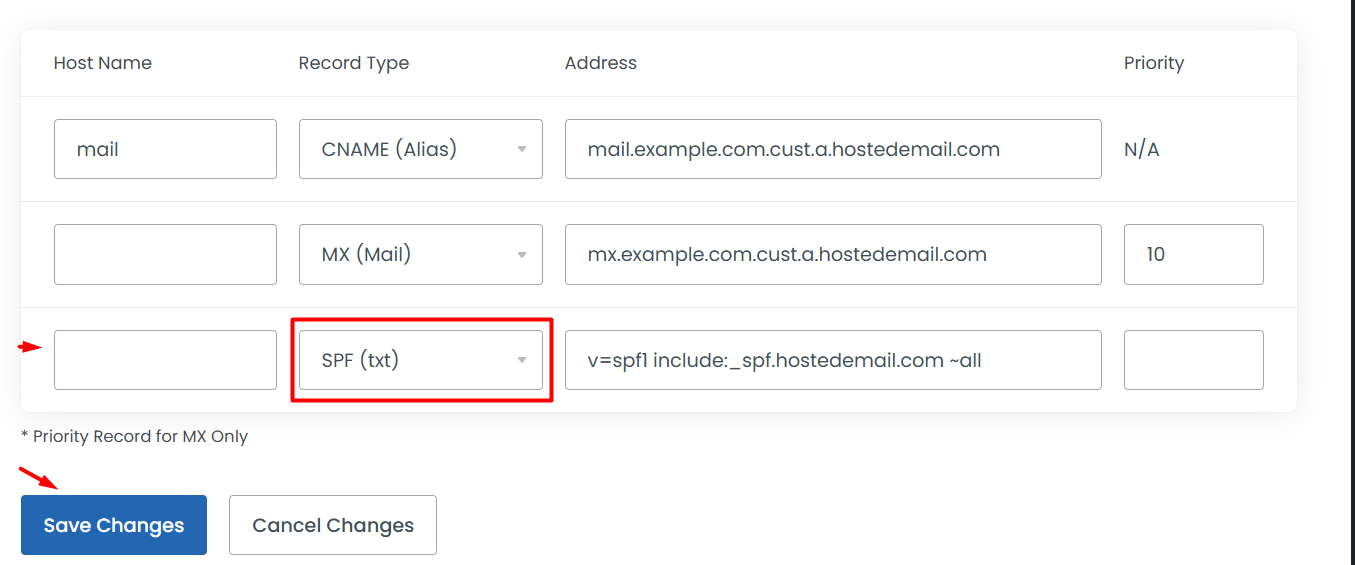
Hostname: Leave it as blank
Record Type: SPF (txt)
Address: Enter the txt value for the email service.
Priority: leave it blank
Once the above records are done, click “Save Changes” button to complete the update. You can check the dns records propagation in dns checker third party tool for your reference.
Step 6: To update the DKIM record, please “open ticket” seekahost client area on your account and request for DKIM record update. Our support team will generate and update the records for you.
NOTE: If you are using any other mx or cname or txt records of other email providers, please remove and update our records to propagate correctly.
If you would like to add the email hosting records in the hosting, you can login to the website cPanel and mange the email records in DNS management option.
Reference Article:
1. How to Setup DKIM Records for SeekaHost Email in Domain
2. How to Set up Custom Email Domain
3. How to Buy a Business Email Address For Your Domain
4. How to Set up Email Records in Cloudflare SeekaHost Mail
5. How to Setup SeekaHost Mail Records in cPanel
That’s all now wait, for propagation, to complete all over the global and use the email service.

