

How to Update DNS Records in Cloudflare

Table of Contents
Do you want to use Cloudflare DNS for your domain for faster response time and redundancy? Want to know how to update DNS Records in Cloudflare for your domain?
This article explains how to update your domain’s DNS records at Cloudflare after pointing the domain’s nameservers.
What is Cloudflare?
Cloudflare is a worldwide content delivery network (CDN) that speeds up the delivery of your website to visitors. It is one of the biggest network operating systems on the Internet. As Cloudflare speeds up the website process, setting up the mail service will also ensure faster deliverability.
How do I Find out Who Manages My Domain DNS?
The nameserver of host updated in your domain tells who manages or have control over your DNS. By default, when you register a domain, it uses the domain registrar default nameservers unless you specify any and keep the control of DNS Records.
After updating the nameservers of host server, the control and management moves to hosting server. Similarly, when you update the Cloudflare nameserver in your domain, the control goes to Cloudflare DNS management.
Prerequisites:
2. Update Hosting Nameserver in domain.
3. Install SSL in hosting server.
4. Update Cloudflare nameserver and configure DNS records.
Steps to Update DNS Records in Cloudflare:
1. Automatic Configure:
Update the hosting nameservers in your domain and allow it to complete the propagation. Once propagation completes, add the domain in Cloudflare to get the Cloudflare nameservers and scan the DNS records. Now it will automatically fetch the DNS records in hosting DNS server to Cloudflare DNS settings. Sometimes, this might take only few records so cross check all the records.
If you the domain default nameservers and update the DNS records in domain, Cloudflare will automatically fetch that as well.
2. Manual Configure:
Before updating any nameservers for your domain, you must first add the domain to Cloudflare and configure all the DNS records in the Cloudflare DNS settings. We will guide you through this process below, assuming you have already added your domain in Cloudflare.
Step 1: Log in to your Cloudflare account.
Step 2: Click “DNS” from left side section -> Records -> Add Record.
Choose the records type as A and then update the A records values in the IPv4 field with proxy enabled. Click Save once done.
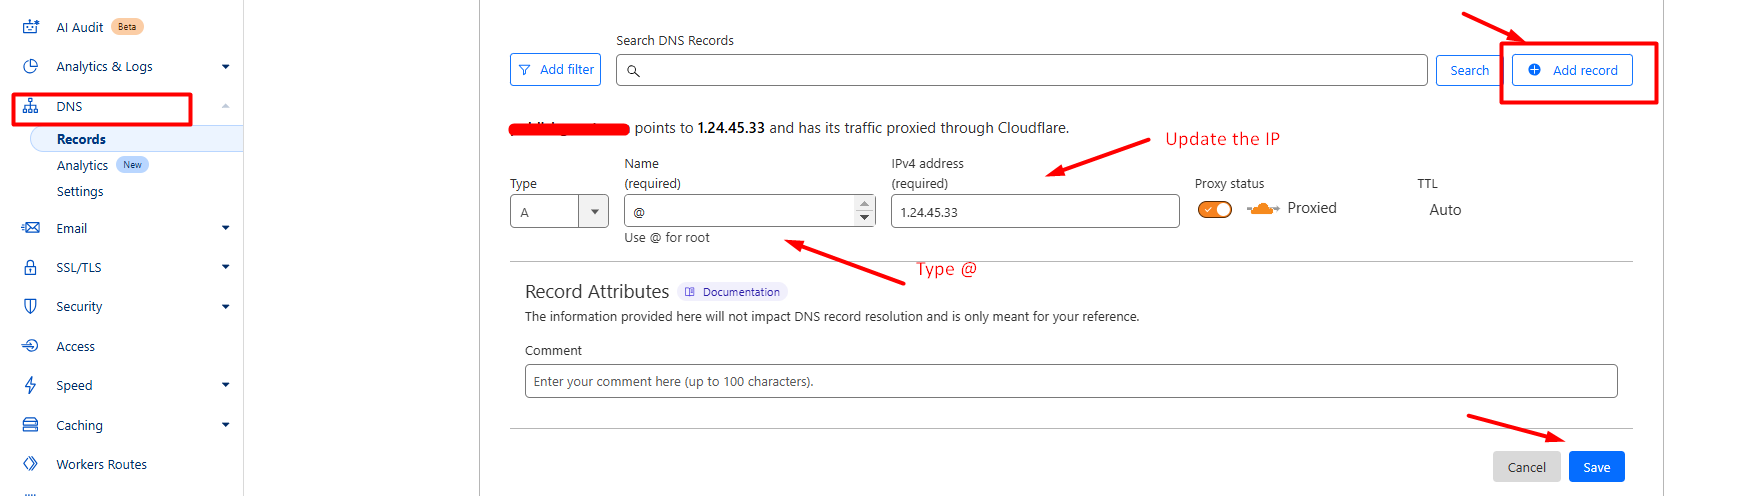
Note: Update A record instead of Nameservers which will not take in Cloudflare.
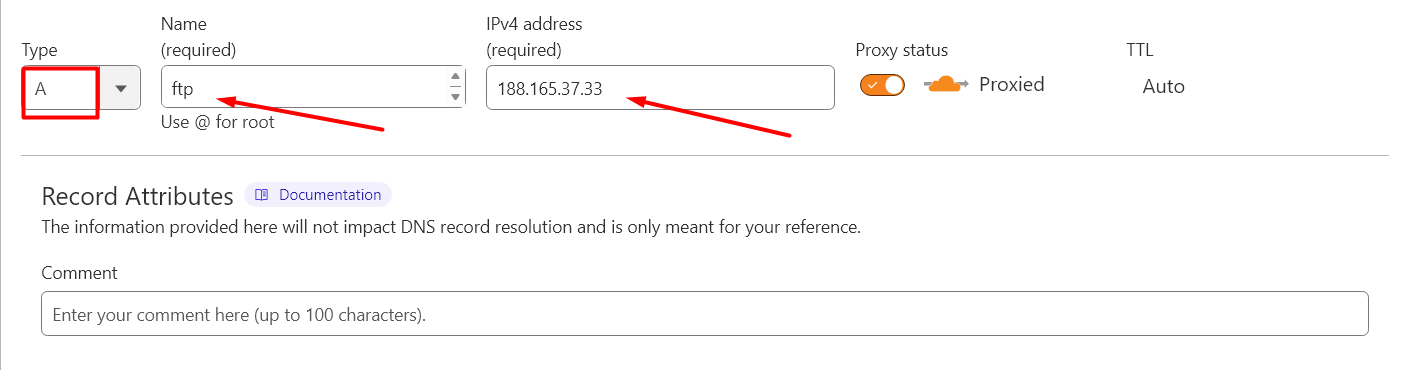
Step 3: Update the FTP Record with proxy enabled.
Record type: A
Name: ftp
Target: Enter the domain IPv4 address.
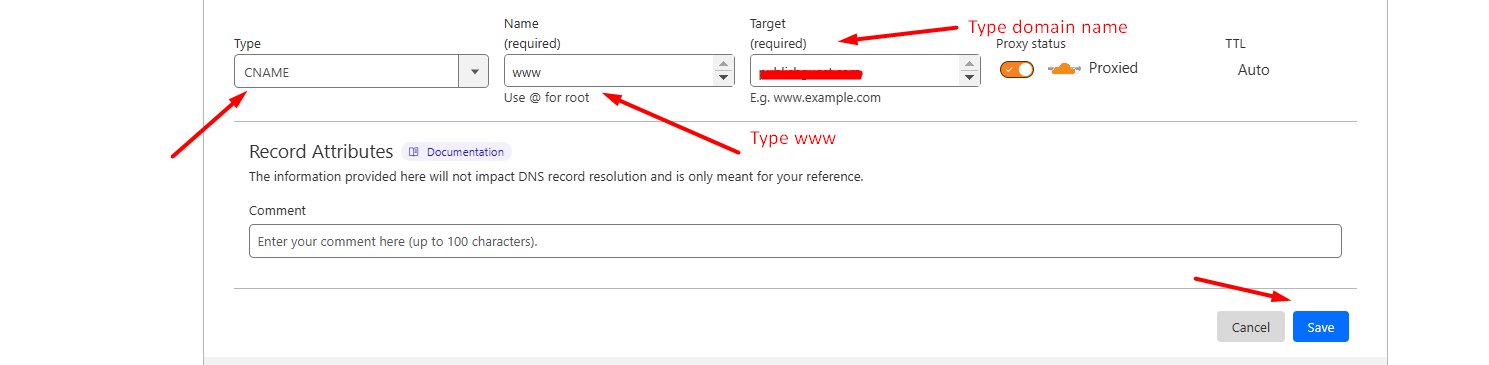
Step 4: Update the CNAME record with proxy enabled.
Record type: CNAME
Name: WWW
Target: Enter domain name
If you have purchased SeekaHost Email Hosting, then you can update DNS Records for email in Cloudflare.
Configure SSL in Cloudflare:
You can only be able to use the “Full Strict or Full mode” on Cloudflare SSL if you have installed SSL in hosting server. It ensures that website load with full secure version on both browser and server end. After install SSL, then you can update Cloudflare nameserver in domain.
NOTE: Recommend to do automatic configure method for this.
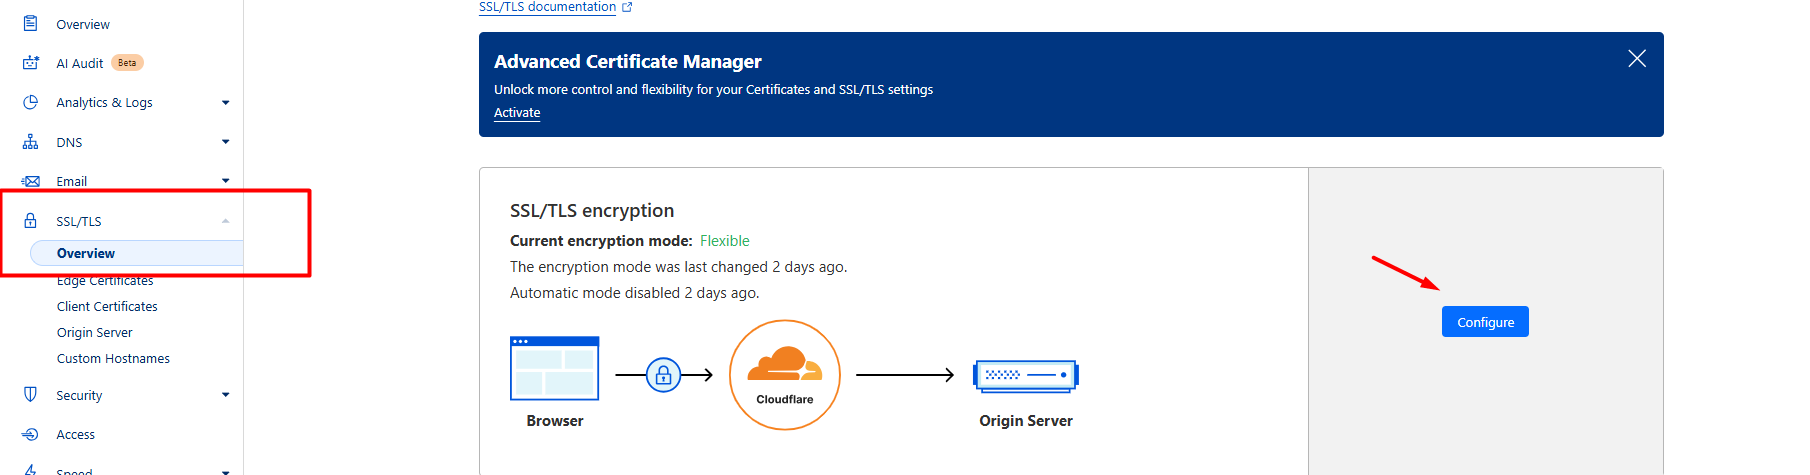
Step 1: Navigate and click the “SSL/TLS” option at the left sidebar, then click “configure” button.
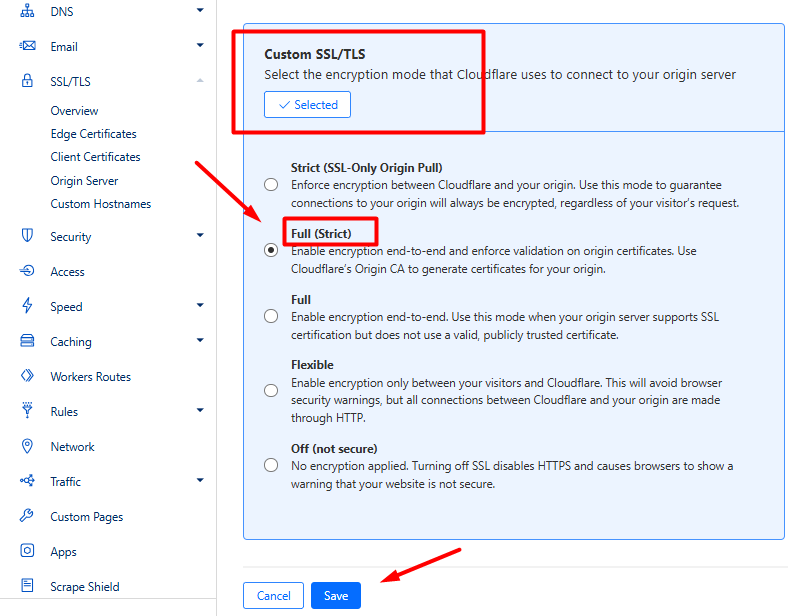
Step 2: Under the Custom SSL/TLS option, select the option “Full (Strict)”, and click save. To ensure it works properly, you need to install SSL in hosting server before updating Cloudflare nameserver.
Once all records are updated, click the “Save” button to complete the process. You should wait for the DNS propagation to live the website.
Hope this information helps you to update all the records in Cloudflare easily.