Simple Steps to Migrate a Website With cPanel Access
Choosing a Proper Web Hosting Provider is very much important for your Business. Web Hosting is the base for a website and if we choose the best hosting provider then we can concentrate on the website. If not then our website will face various issues related to the website hosting, loading, Down time and more. Read the previous articles to know about the Qualities of Proper Web Hosting Services and Tips to Choose Best Web Hosting.
Steps to Migrate a Website with cPanel Access
- Make sure you have cPanel Access for the Old Server (Previously Hosted Server) and New Server.
- Login to the cPanel of the Previously Hosted Server.
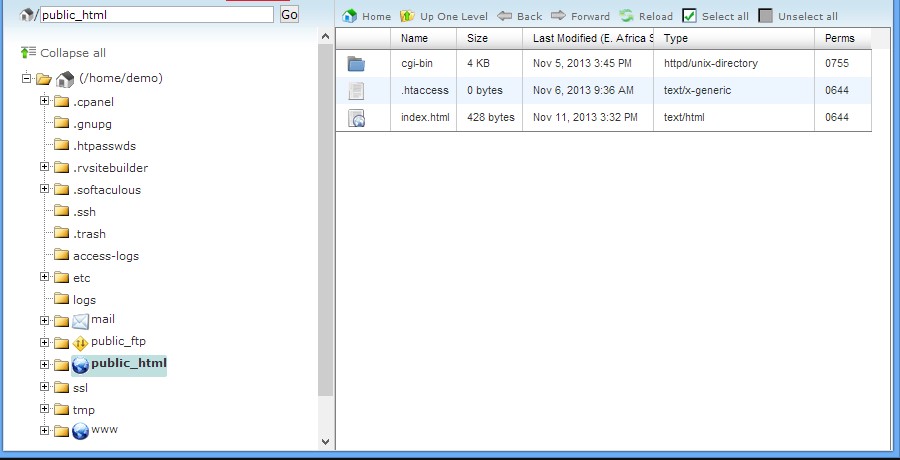
- Compress the files placed in the Public_HTML of the Domain to be migrated.

- Once the Data inside the public_html is compressed into zip file, then download it to your local PC (Personal Computer).
- Now we want to backup the database details.
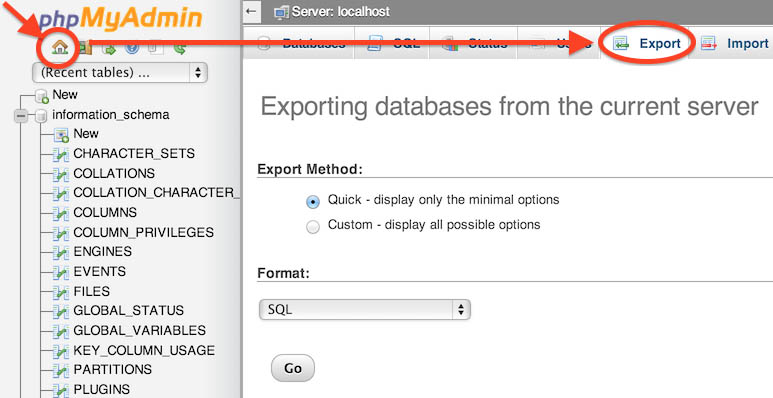
- Go to phpMyAdmin in the cPanel and Select the appropriate database that corresponds to your website. There may be more than one database in your cPanel so we must be careful while exporting it.
- Click on Export and save it in your Personal Computer.

- After downloading the contents from the old server, login into the cPanel of New Server.
- Once the Account is ready, go to MySql Wizard in the cPanel and create new Database.
- After Creating the Database, create new user and allocate the privileges for the user in that Database.
- Note: Keep all the Login Details of the Database and User safely, to configure it later.
- After that, move to phpMyAdmin and click on the database you created. Click on Import and choose the sql file downloaded from the Old Server (Previous Hosting).
- Once completing the Database migration, go to public_html section in the New Hosting and Import the Zip file downloaded from the previous server.
- After importing the zip file, select the uploaded file and click on extract.
- Once extraction process is completed, Go to wp-config.php.
- Here we want to configure the database connectivity, to do that we must edit the wp-config.php file and check with the saved login details of new database.
- Once the configuration part is over. Get the Name Server details from the new hosting provider and configure it in your DNS Setting.
If you feel difficult to Migrate in this method, you can also migrate your website using Duplicator or using All in One WP Migrator.

