
How to Set up Domain Forwarding in SeekaHost

Table of Contents
Domain Forwarding has other names such as URL Forwarding, or Domain Redirection which is a service that allows you to redirect your visitors from one domain to another domain. You can use our free Domain forwarder option to create redirection to your desired domain name without any hosting for the domain.
If you want to have a separate website to build and live the content, consider our WordPress Hosting for more website host.
Myth about Domain Forwarding:
There are two types of myths around this domain forwarding. One is that you can do the redirection in DNS management and another is that you should redirect using the masked Domain redirection to avoid any affect on SEO ranking or google indexing. But that is not the case.
1. In DNS management you cannot enable the redirection and only can point the A record to the website which you want to live the content. Website Redirection and Domain Forwarding are two different things in the redirection process. In website redirection you can either mask the URL to load the same content in two different domain name. But Google and other search engines will identify it as duplicate content.
2. In case of Domain forwarding, you will totally move the visitors/crawlers from one to another website which tells everyone that you have permanently moved to new location and allows search engine to index it (Retain – Traffic + Existing SEO value to new destination).
NOTE: You cannot use both free Domain Forwarding and point old website at the same time.
Process to set up Domain Forwarding:
STEP 1: Login
Login to client area and click ‘Domains‘ section to view list of domains registered under your account.

STEP 2: Choosing the domain
Choose the Domain in which you want to enable the domain forwarding.
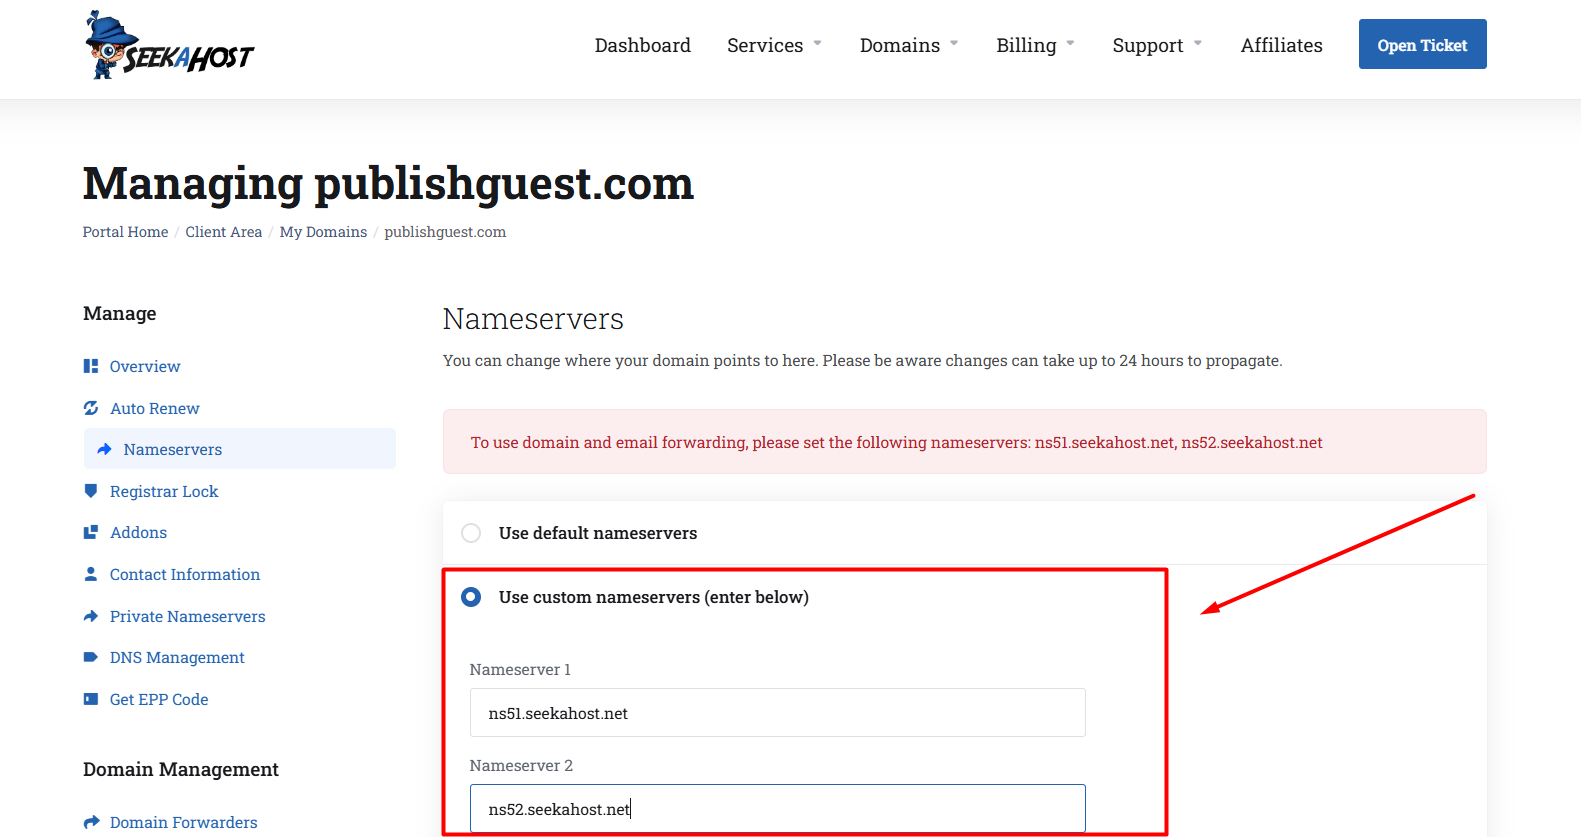
STEP 3: Nameserver Update
Click the ‘Nameservers‘ option and update the below nameservers for the domain.
ns51.seekahost.net
ns52.seekahost.net
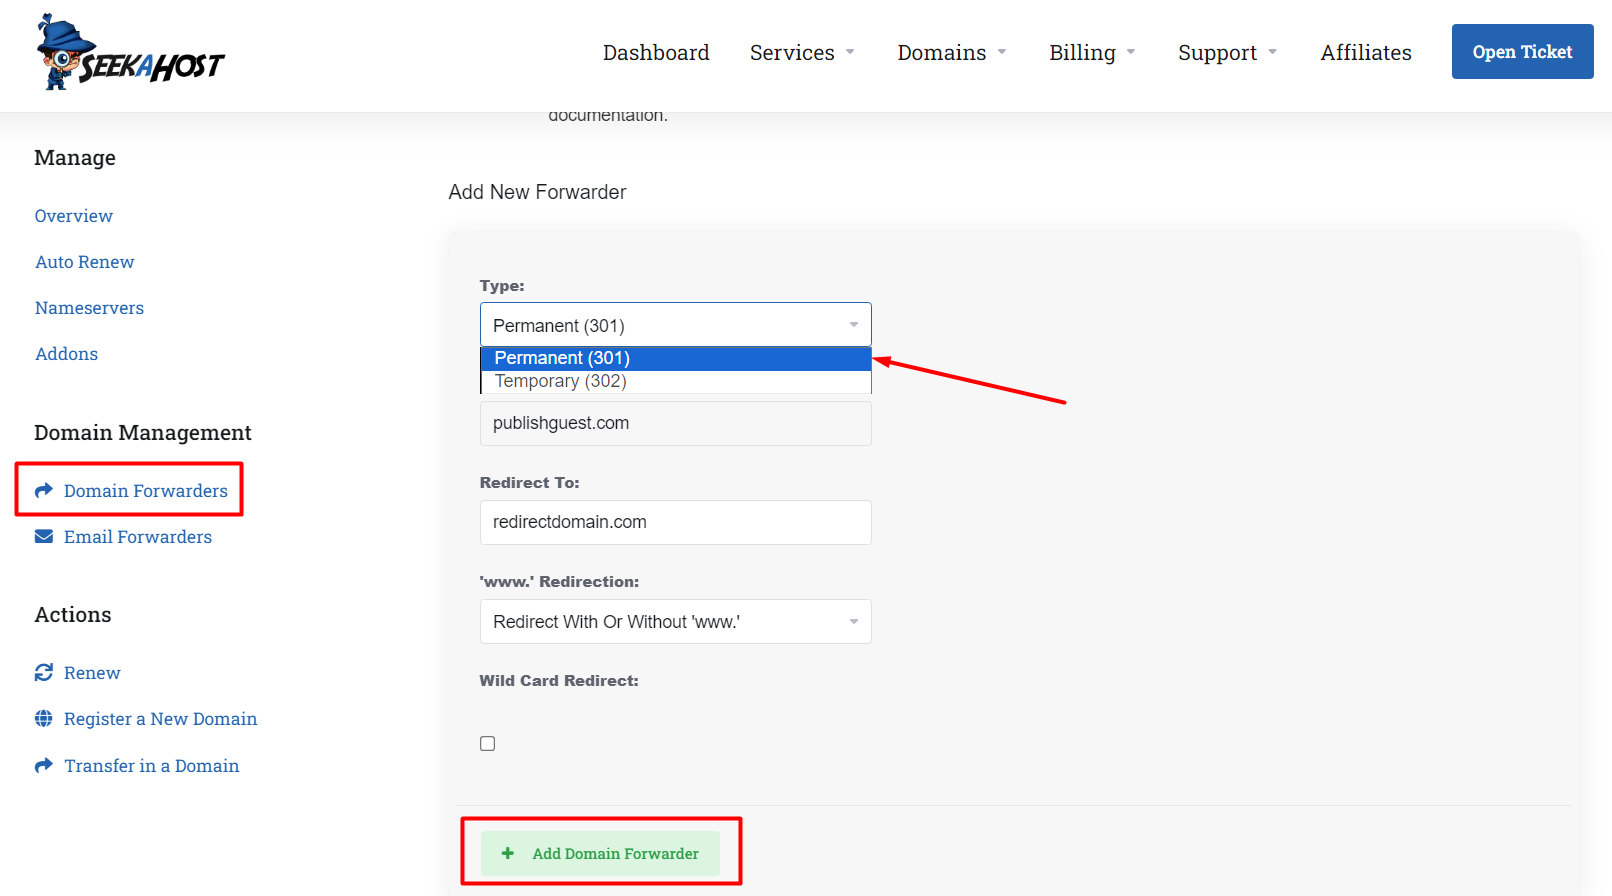
Steps to Enable Domain Forwarder:
- Click “Domain Forwarders” and choose either Permanent (301) or Temporary (302) under the Type section for Add New Forwarder.
- In Redirected to, please specify the domain to which you want to redirect to.
- Select your preferred option for redirecting from the below options.Only Redirect With ‘www.’ -> If only load website with ‘www’, it will redirect.
Redirect With Or Without ‘www.’ -> It will redirect if load with both www and non-www.
Do Not Redirect ‘www.’ -> If load website with www, it will not redirect. - Click “Add Domain Forwarder” once done.
Instructions:
1. Only after updating the specified nameservers, the forwarder option will work.
2. After setting up the domain forwarder, install SSL on the new website and build the content there.
Additional Resources:
How to Redirect URL (Pages/Posts) in WordPress with Rank Math Pro?
How To Redirect From Http To Https – 3 Methods on WordPress Website
Using Expired Domain for 301 redirection to gain SEO Advantages
If you are a registered user in SeekaHost and have any queries to be clarified or issues to be sorted, you can raise a ticket through the client area dashboard or email Webmin [email protected]. For immediate interaction or guidelines, contact our support team available in Live Chat at the right bottom corner of the website.