

How to Setup Zoho Mail with Domain

Table of Contents
Little did they know that you can setup Zoho mail without purchasing or transferring the domain to Zoho, and you can configure Zoho email records in a third-party domain easily.
In this article, we will guide you with step-by-step process on “How to Setup Zoho Mail with Domain”.
What is Zoho Mail used for?
As like other email services Microsoft, google, SeekaHost, etc., Zoho also provides email service which gives email platform or interface to send and receive emails for personal and business communication. It offers you a more convenient and customizable email client portal, SMTP and IMAP configuration settings to connect in with any other email service.
Send Restriction in using Zoho Mail:
- Promotional emails
- Bulk or Mass emails
- Marketing emails
- Newsletters
- Automated Emails
Prerequisites:
2. Add and get the verification code for the domain in Zoho.
3. Domain should be active.
4. Delete the existing TXT, MX Records and update the new record.
Before starting with the process, make sure to add the domain in zoho and generate the verification code for the domain to set it up in the domain or hosting.
How to Setup Zoho Mail with Domain
Hoping that you are using domain default nameserver and managing the DNS records with domain registrar. If you have registered domain with SeekaHost, then you can use the following default nameserver for your domain.
ns1.systemdns.com
ns2.systemdns.com
ns3.systemdns.com
Follow the below steps to setup Zoho records in the domain with SeekaHost.
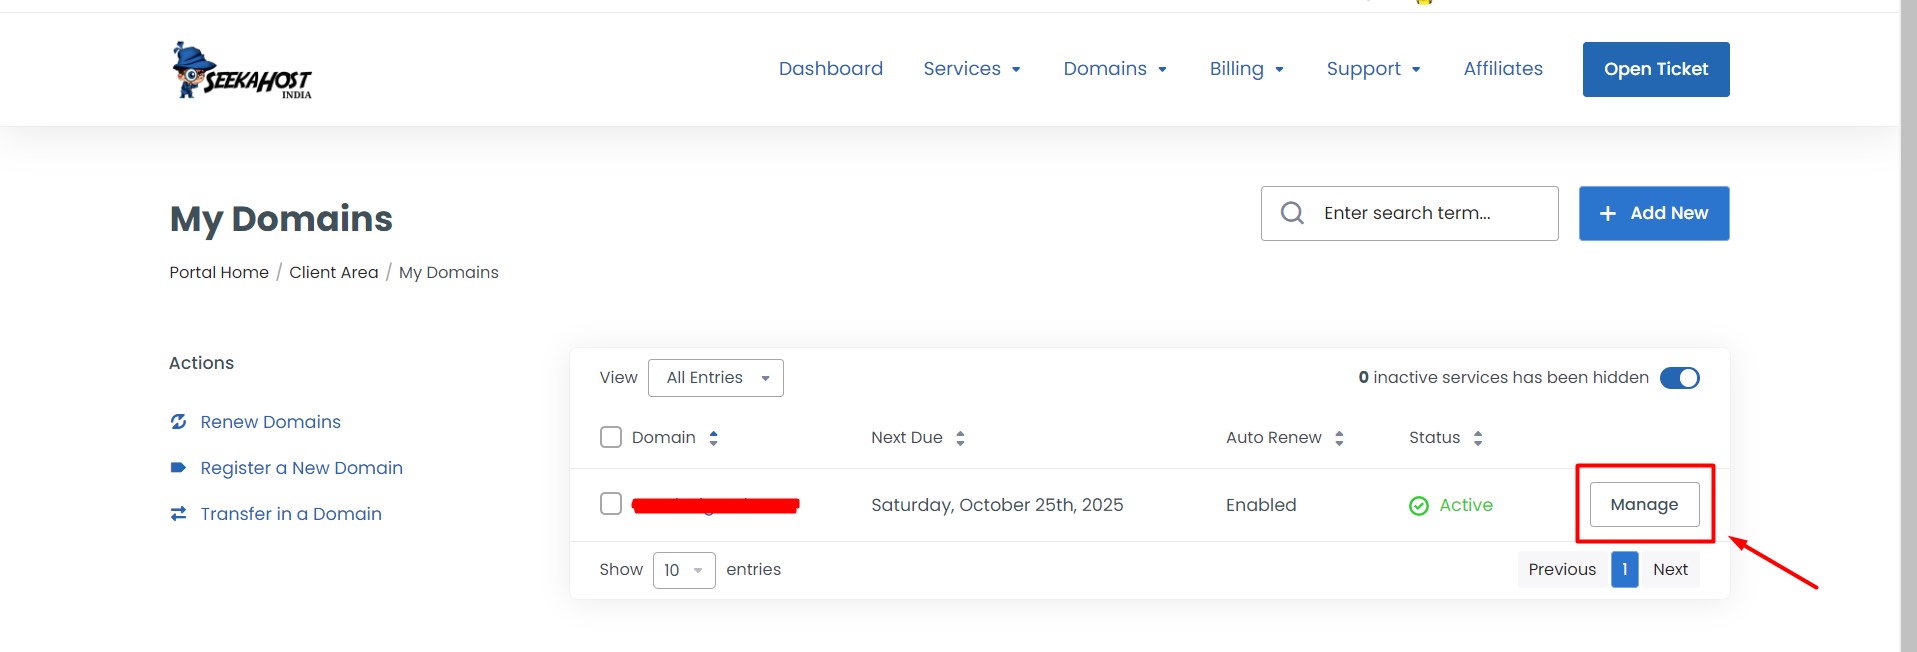
Step 1: Login to SeekaHost Client Area.
Step 2: Click the Domains section -> Manage button next to your domain name.
Step 3: On left side section, click DNS management -> Txt record type and paste the Txt code. Complete the domain verification via Txt or CNAME method. Here we are using the TXT record. Now click ‘Save‘ Changes.
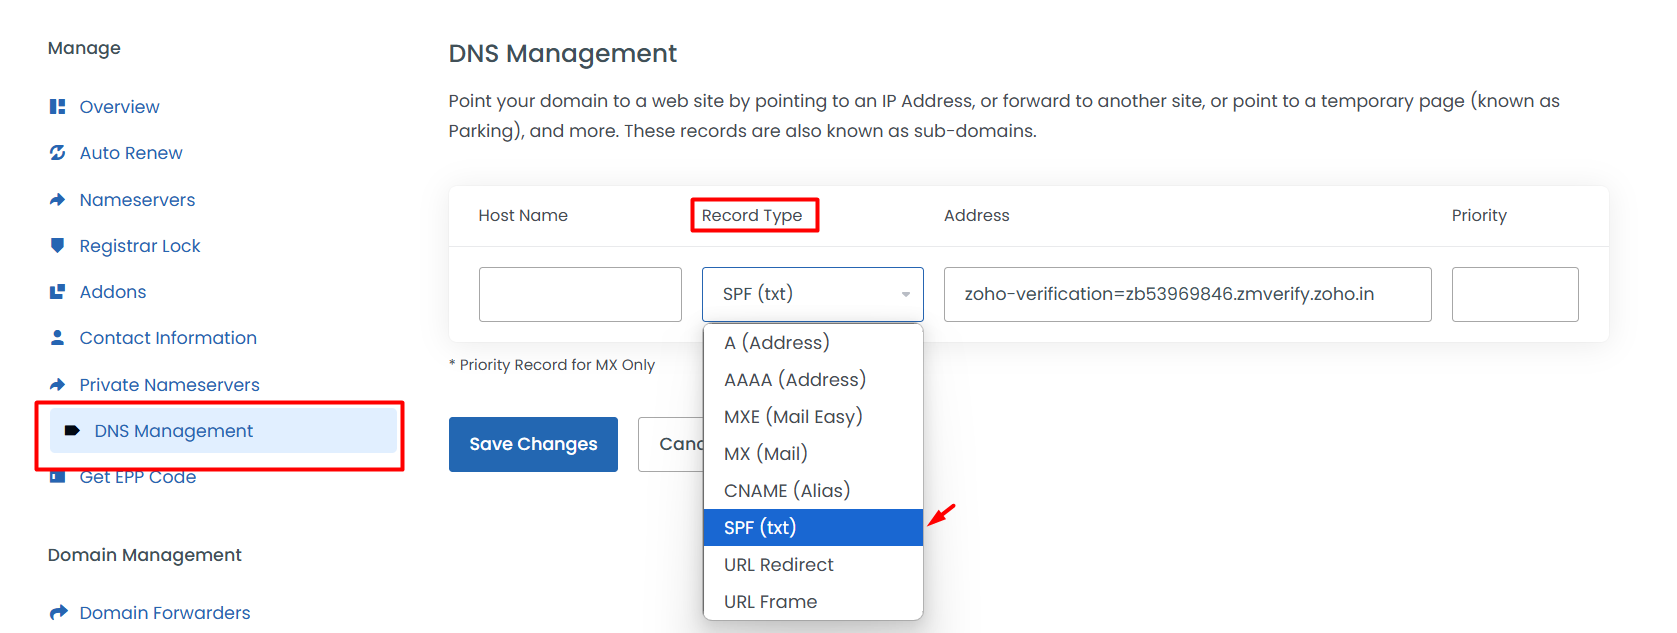
Once the domain verification is completed, login to Zoho mail admin console area and find the required MX records, TXT and DKIM Records to update in domain.
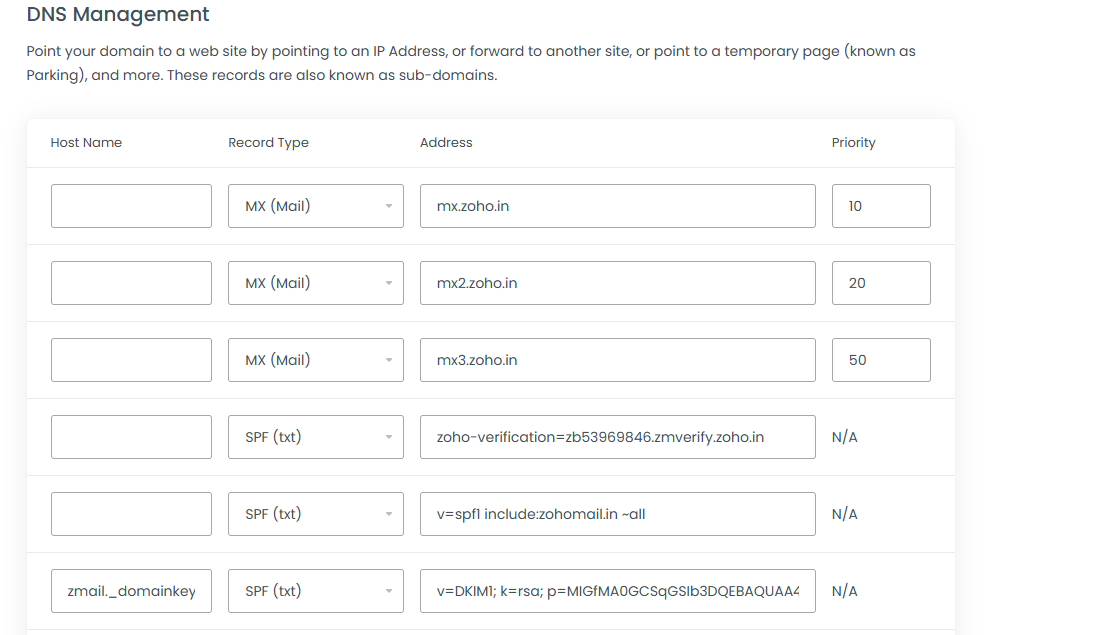
Step 4: In domain DNS management option, Choose the records type as MX (Mail) and update the MX record followed one by one. Once MX Records are done, update the SPF record and DKIM records as well by choosing the record type as “TXT Record“.
Click “Save changes” after each record value updated.
Note: Please wait for DNS propagation, which takes 24 to 48 hours to complete globally.
How to Setup Zoho Mail in cPanel
Hoping that you are using hosting nameserver in your domain and managing the DNS records with hosting dns service. If you have registered domain with SeekaHost, then you can use the following default nameserver for your domain.
Step 1: Login to the cPanel.
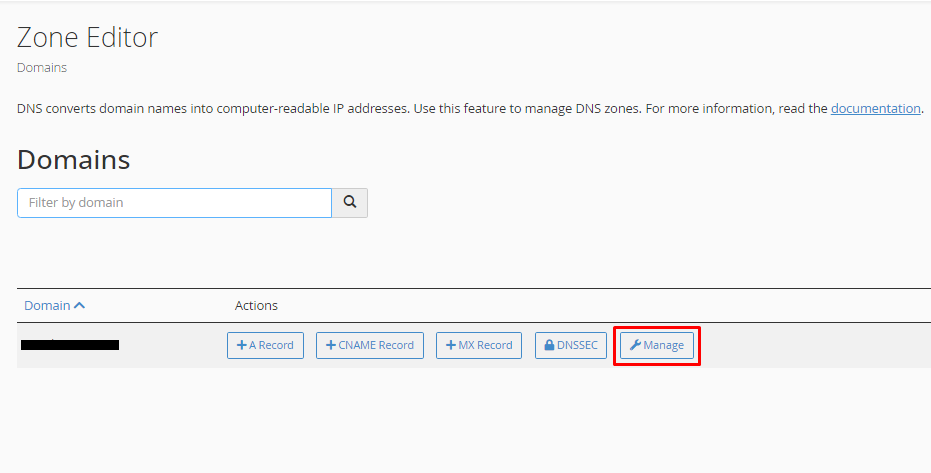
Step 2: On top, search zone editor and click the option.

Step 3: Here, click “Manage” button near the domain name.
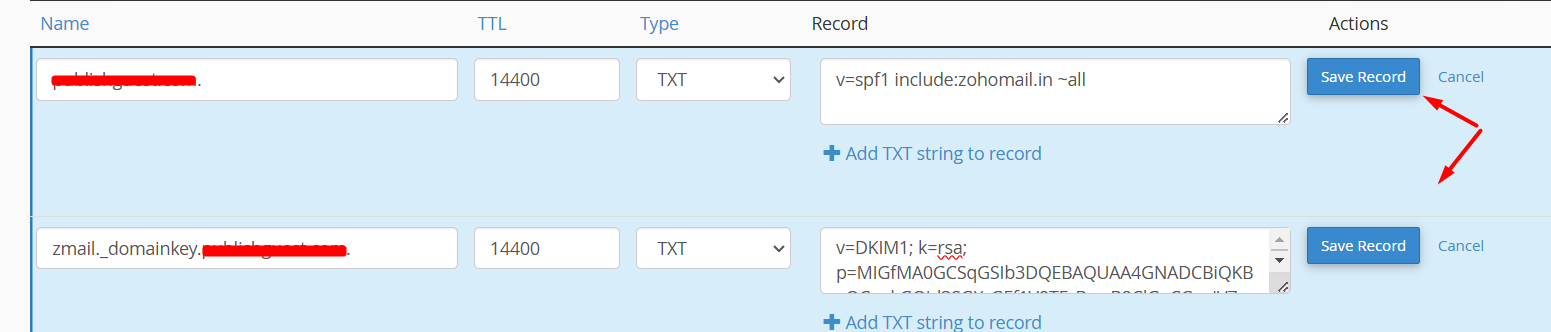
Step 4: Click down arrow in right corner and click “Add TXT Record” to update your Zoho Txt Verification Code.

Update the record as follow,
- Name – Enter the domain name
- Record – Paste the verification code you have copied from the Zoho.

Step 5: Click “Add MX Record” and update the MX records as follow,
- Name – Enter the domain name
- Priority: Enter the value as 10
- Record field: Paste the verification code you have copied from the Zoho mail

Do the same as follow for updating the remaining two MX records with the value as follow under the Record section,
mx2.zoho.in – 20
mx3.zoho.in – 50

Step 6: Choose record type as”Add TXT Record” for both SPF and DKIM records and add the value as follow. You can get these records from zoho admin console.
- Name – Enter the domain name
- Record field: Paste the SPF record, provided in Zoho.
Again, click the same option, to Add txt records
- In the name: enter the Zoho hostname and it will take your domain automatically
- In the Record field: Paste the DKIM record, you have copied from the Zoho admin console
Once all the DNS records are updated, click “Save All Records” at the top where you add the records.
Configure Email Routing in cPanel:
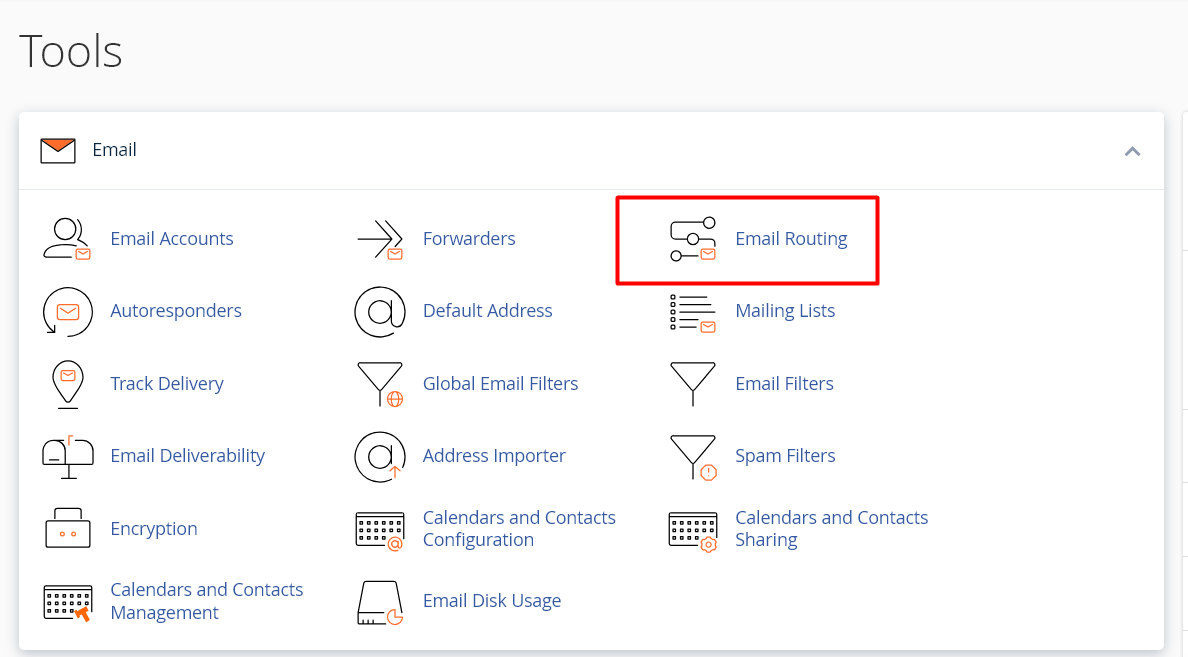
Step 1: Go back to cPanel home page and Under Email section, click “Email routing” in cPanel.
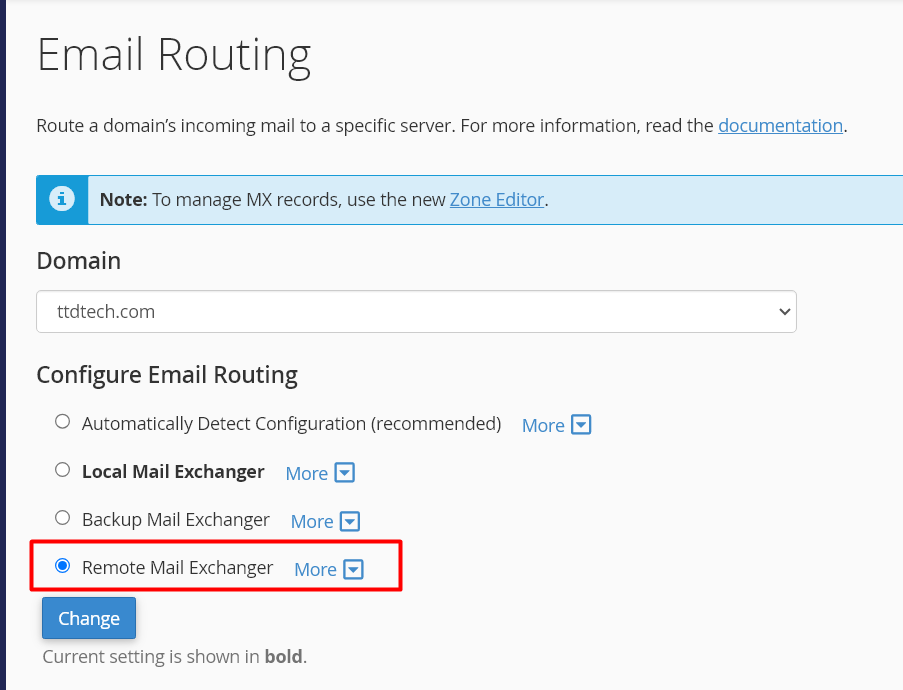
Step 2: Choose the respective domain name from the drop down and select the option as “Remote Mail Exchanger” and click “Save Changes“.
That’s all now your Zoho records have been successfully added to the cPanel zone editor.
Note: Please wait for DNS propagation, which takes 24 to 48 hours to complete globally.
Hope this article helps you to setup Zoho mail records in the domain and hosting.