How To Update Private Name Servers In Name.Com?

By Aslam Saah
Table of Contents

In this article, we have guided you on how to update (or) register name servers in Name.Com. Follow the steps which are mentioned below for updating the name servers.
STEP 1: Login
At first, log in to your Name.Com account
STEP 2: My Domains
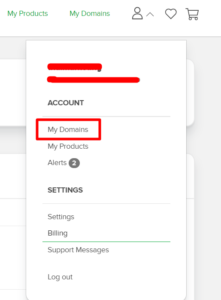
Click on ‘My Domains’ which is present on the top right corner.
STEP 3: Manage Domains
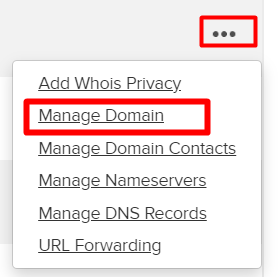
For the domain to which you would like to update the nameserver, click on “quick links” and select “manage domains”.
STEP 4: Name server Registration
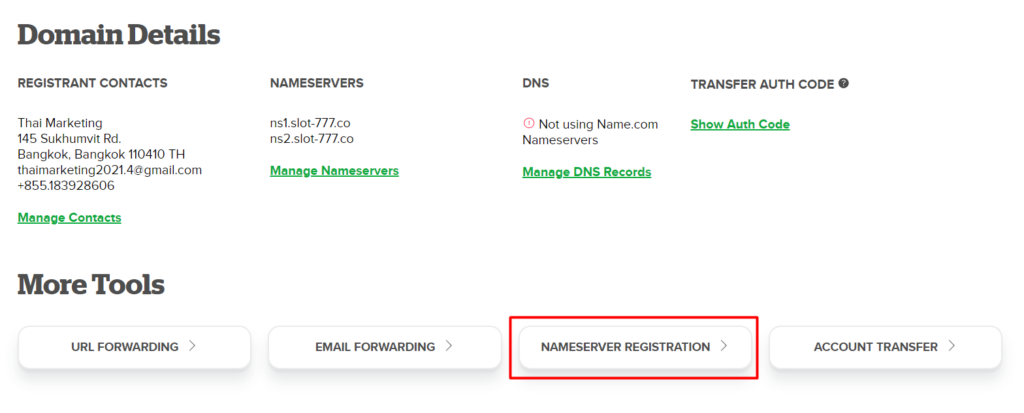
Once you have selected manage domains, you will be lead to below interface, where you can see an option as “Nameserver Registration”. Click on it to proceed.
STEP 5: Manage NameServer Registration
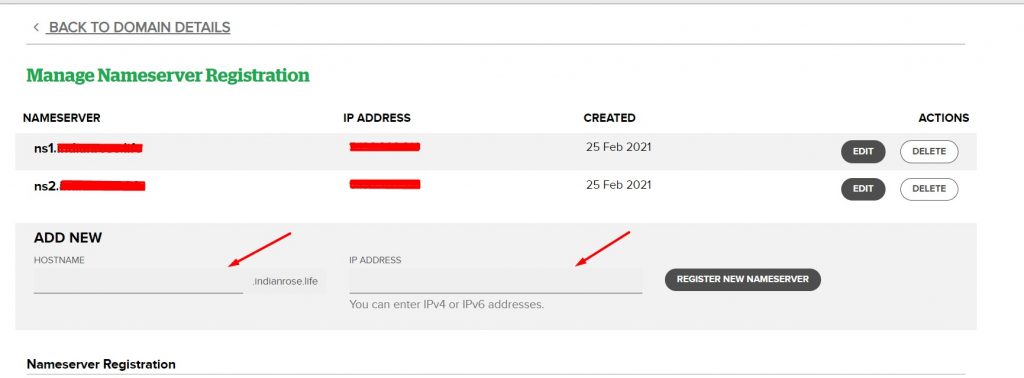
In the hostname field, update ns1 and in the IP address field update the allocated IP address for that nameserver and click on register new nameserver. Do the same for ns2 as the hostname and its appropriate IP address and register.
Step 6: Back to Domain Details
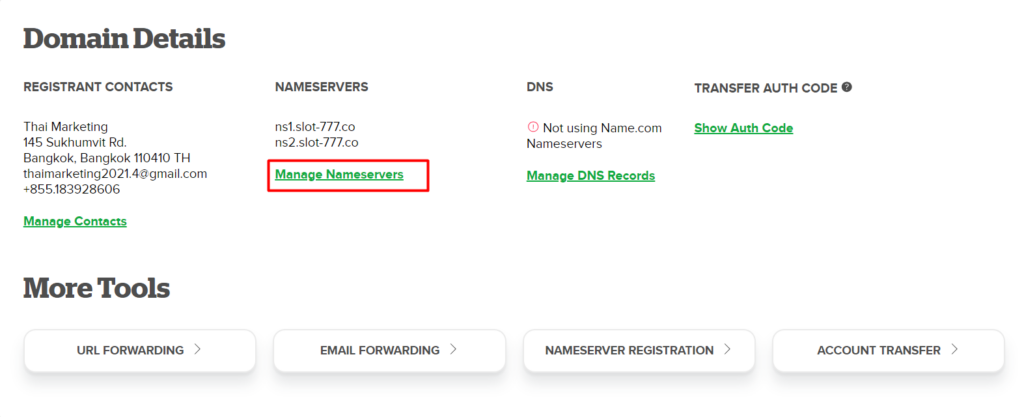
Click on Back to Domain Details as shown in the above screenshot. You will be directed to the previous screen as shown below, where click on “Manage Nameservers”
Step 6: Manage NameServers
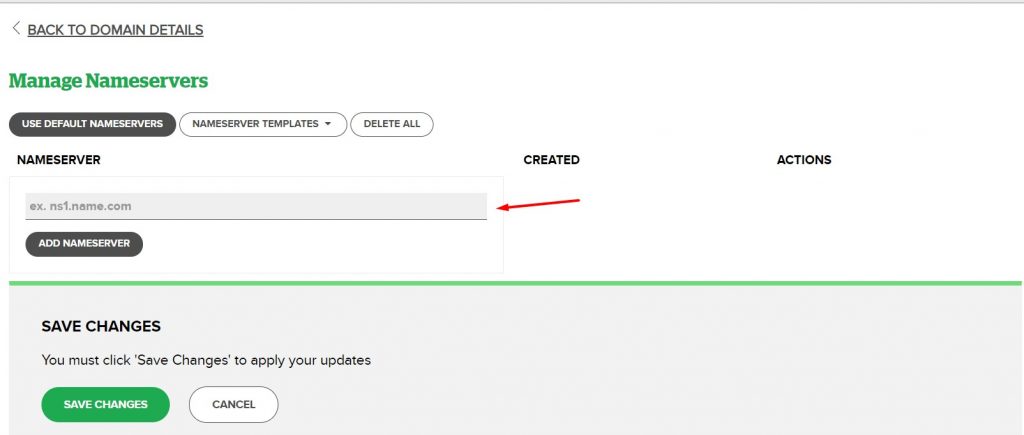
In the Manage Nameservers section, if you see any other/default nameservers, delete all the nameservers. Once deleted, fill in the full nameservers and click on add nameservers.
For example, if your domain is xyz.com -> the nameservers are ns1.xyz.com and ns2.xyz.com.
Fill ns1.xyz.com and click on “add nameserver”. Do the same for ns2.xyz.com. Once done, click on save changes.
The nameserver might take a maximum of 24 to 48 hours for propagating over online and reflect.
These are the steps that should be followed while registering (or) updating name servers in Name.Com
[Tweet “How To Update Name Servers In Name.Com?”]
If you like to know more about the Private Name server and why it’s used on domains hosted under PBN Hosting package, contact our Live Chat Support or mail to [email protected] for more details.

